Before I proceed, it should be noted that this tool only works with Acer devices powered with MTK chipset therefore, other Acer devices powered with Qualcomm or any other chipsets may not work by this tutorial.
Removing FRP Lock On Acer Android Devices Using NCK BOX
1. Download NCK BOX from your ABC Package here on Mediafire or Mega.2. Download and install MTK Android drivers on your PC. You may use PDanet+ or Install USB VCOMM Drivers from here!Important.
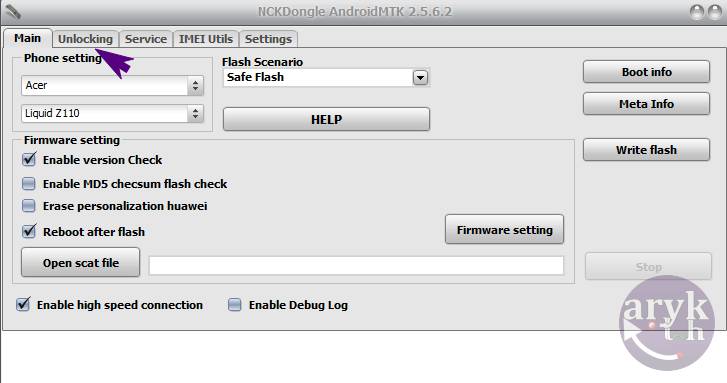
3. Now, locate NCK BOX you downloaded from the step one above. It is compressed in a ZIP file, unzip it and then, install the setup file on your PC and launch it. Launch/Open NCK Box you just installed as Admin.
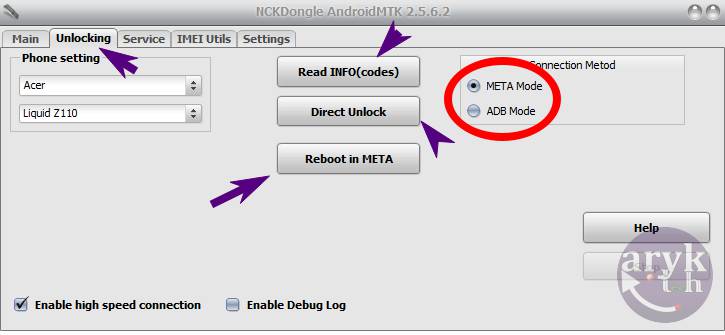
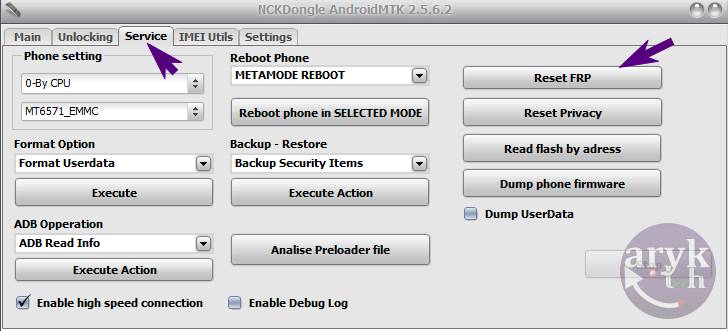
4. On NCK Box, locate Service tab. From the third (3) pane, Locate FRP and click it. Pay attention to the Warning NCK Box displays and make sure your Acer android device meets up that criteria.
5. Now, remove battery from your Acer android device and insert it again. If the battery cannot be removed, put off the phone.
6. While NCK Box awaits, connect a compatible USB Cable to your PC and then, the other end to your Acer android device.
7. Almost immediately, if the installed drivers work with your Acer android device, NCK Box should detect the phone and initiate the operation sequence. This should not take more than 5 minutes. When NCK Box is done, your phone will restart and if it doesn't, disconnect the phone and restart the phone by yourself.
8. Congratulations! By now, you should be greeted with your setup screens. Complete the setup and enjoy your phone!
What is FRP Lock?
For informational reasons especially to those that do not know what FRP Lock is or means, a brief note about what FRP Lock is and its meaning should be included here so that you may know how to avoid re-occurrence of the same issue afterwards.If your Acer android device asks for owners credentials that was used when the phone was first setup. Or, maybe it's demanding for a specific Google account and rejects all the ones you have entered on the phone though the credentials (password and username) entered are correct, then, most likely; your Acer android device has been locked-up to FRP.
Factory Reset Protection, FRP for short, is a security measure embedded on android devices. Starting from Android 4.4.4 or more commonly, Android 5.0 Lollipop, ends up in FRP when you factory-reset the phone. FRP Lock is triggered more commonly when you factory-reset such android device from the recovery or using a PC program.
In essence, FRP is there to protect unauthorised access to such android devices following a Userdata-wipe or Factory-reset operation.
How to Prevent FRP Lock Re-occurrence On your Acer Android Devices
It's simple. To prevent your Acer android device from ending up in FRP-Lock, you simply have to delete or remove any and all Google accounts associated with that device. By these, I mean all the Google accounts that are activated on your Acer android device.To know how many Google accounts are associated with your Acer android device, go to Settings >> Accounts >> Google. Click on Google and you will be able to see the list of Google accounts already associated with your device.
How to Delete or Remove Google Account On Acer Android Device
1. Go to Settings >> Accounts >> Google.2. From Google under Accounts, tap on each of the Google accounts listed and then, press/tap the Menu button or iCon.
3. From the options that show up, click Remove Account.
4. Repeat this process for every Google Accounts on your Acer android device until there is none left.
Now, you may peacefully proceed to wiping the userdata or factory-reset your Acer android device.
Recommended: