How to Root Android N On Nexus Android Devices

Recently, Android N Developer Preview images was released for Nexus devices. You may check here for the list of the Nexus devices.

But, if you have installed the Android N developer preview on your Nexus device and would like to root it, root exploit is now available. You can either gain root access by flashing SU Script via TWRP Recovery or by using the CF Autoroot.


Page Content Menu | Related Links
Page Content MenuRelated Links


Android N and Android Root?

Android N which would also be known as Android 7.X.X is the latest Android OS version, currently in Developer Mode and strictly experimental. Android N is believed to succeed Android Marshmallow which is also known as Android 6.X.X.


Android Root or Rooting simply put, is the process through which an Android device user attempts to gain root access "priviledges" on the devices. Android Root is comapreable to iOS Jailbreak.

A user with a rooted Android device would have more control over the device that one with unrooted Android device. On rooted Android device, you can decide to change your device fonts, the sound, modify the system files and a host of others.


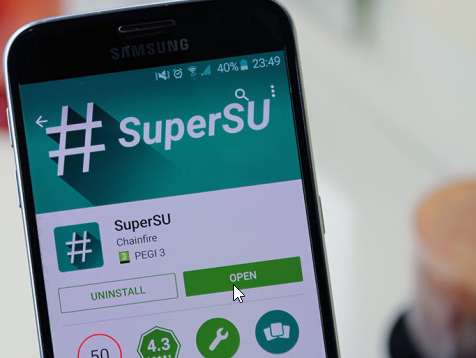
If you have updated your phone to Android N, you will be happy to hear that Chainfire, the developer who is responsible for some of the most popular root apps on the Play Store, has released SuperSU v2.69 which supports Android N Developer Preview. The easiest way to root Android N is by flashing SuperSU v2.69 through a custom recovery such as TWRP, but if you have no recovery installed, then there is another alternative called CF Auto Root.


The developer has put SuperSU inside CF Auto Root and you can root your phone without a custom recovery. You need to install your phone’s PC USB drivers, go into fastboot and execute the included file. Simple as that!


How To Root Android N With SuperSU v2.69 and CF Auto Root

Since TWRP is not yet available on Android N, the developer recommends using CF Auto Root. It is the simplest way yet known for rooting Android N devices.


1. Go to the Download Section here. Download the right CF Auto Root file for your device.


2. Once downloaded, extract the file on your PC.


3. Download USB Drivers for your device and install it on your PC. This can also be downloaded from the Download Section here.


4. In the CF Auto Root File you extracted, you will find two folders and three files namely: “root-windows.bat”, “root-mac.sh” and “root-linux.sh”. Each file is for a different OS, Windows, MAC and Linux respectively.


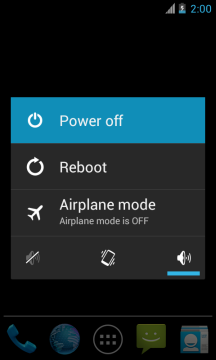
5. Now, turn your phone off and boot the phone into bootloader or fastboot mode.


6. Connect your phone to your PC using a compatible USB cable.


7. Wait few seconds for the PC to detect the device and install the required drivers than, Double-click on one of the three files in the CF Auto Root folder, depending on what OS you are.


8. Let the program do its works. Follow the instructions if any is given. After few seconds, the phone should reboot.

By now, your Android N device should have been successfully rooted and have SuperSU installed.


Download Section:

NEXUS 6P CF Auto Root Download Link.

NEXUS 5X CF Auto Root Download Link.

NEXUS 6 CF Auto Root Download Link.

NEXUS 9 CF Auto Root Download Link.


Android USB Drivers Download Link.


ProTIP:

1. If you have installed Android N developer preview on your Windows PC, you do not have to root it.

2. Rooting gives you access to files and folders you should ordinarily not have access to on your android device. While it is done to help some achieve certain goals, rooting may also render your android device useless.

3. If you have rooted your android device, beware of apps that you install on your device.

4. Generally, Root Access should be explored with CAUTION on Android.


Helpful Links:

How to Root Android Devices without PC

How to Root Samsung Galaxy S7 and S7 Edge

How to Root Samsung Galaxy S6, S6 Edge, S6 Edge Plus and Note 5 On Android 6.0.1

How to Flash STOCK ROM Image On Nexus Android Devices


How to Flash Firmware On Qualcomm Android Devices Using GNQC: Gionee, Huawei and Others

If you are amidst the need to service your Qualcomm Powered android device and could not find any help useful as such, relax! This might really help you. And the step by step procedures here will only take you few minutes to complete.

Here, I discuss the step by step process of flashing firmware on your Qualcomm Powered android devices using GNQC Flash Tool. GNQC can flash stock ROM on any Qualcomm Powered android device so long as the ROM structure is in the right format.


Brief Note and Page Content Menu
NotePage Content Menu
This tutorial is made specifically for those who have purchased the A B C Package. A B C Package is a special phone software repair package prepared for every individual who wish to learn solutions to various phone software problems and perhaps, start practicing mobile phone software repairs hence; earning living in the cause. Details about A B C Package is here

Introduction to Flashing and the Related Terms

1. Flashing is the process of reverting your device, in this case, any Qualcomm Powered smartphones back to its factory defaults by means of flashing STOCK firmware on it. It can also be accomplished by means of flashing Custom ROM/Firmware on the device though.

Flashing is done to correct any software malfunctions experienced on any android devices. Even those that seem persistence after performing a Factory-Reset would be corrected by flashing the device.


Qualcomm Powered smartphones include some Lenovo, LG, Gionee, HTC and other android devices you know off that carry Qualcomm label. All of these mentioned devices can be flashed using GNQC Flash Tool.


How to Flash Qualcomm Android Device Using GNQC

1. Download and extract GNQC DownLoad Tool on your PC from the DownLoad Section here. Within the GNQC folder is also contained the necessary Qualcomm android drivers that you must install to enhance easy communication between GNQC and your android device. See the image below. The Download Link is found in the Download Section here.


GNQC Qualcomm Drivers

2. Double-click Driver v1.1.0.0.exe to install the Qualcomm USB Drivers on your PC.


3. Now, extract the stock ROM you wish to flash on your Qualcomm powered android device. If you have not downloaded it yet, download and extract the Stock ROM on your PC.


4. Open GNQC_DownLoad.exe as ADMIN, preferably. Remember to check the Download Section here for the Download Link.


GNQC Qualcomm Android Flash Tool

5. On GNQC DownLoad Tool, Click on BP Browse Button and locate the bp_image folder in which you have extracted the firmware you extracted in Step #3 above.


BP Image Browse Button

6. Now, Click on the AP Browse Button just below BP Browse Button to add the Firmware Folder which would be used by GNQC for the flashing operation.


BP Image Browse Button

7. To finally prepare GNQC for the operation, select WBW8901 in the name path. NOTE: Different Name Path can be used for different devices therefore, you switch Name Path until you find the one that works for your device.


8. Now, on GNQC, download will be highlighted automatically thus; ready to download.


9. You can now Connect your Android Device to the Computer. Make sure you power it off before you do so.


10. Almost immediately, GNQC DownLoad Tool should begin flashing the firmware on your Android Device.


11. Once Flashing completes, GNQC should display a Green Successful message Status.


12. You may now close GNQC DownLoad Tool and disconnect your Android Device from the computer.

By that, you have now successfully flashed your Qualcomm powered android device using GNQC.


Download Section:

Qualcomm Phone Flash Tool and Drivers Download Link


ProTIP:

1. Following this tutorial, you can flash all Qualcomm powered android device in as much as it is in zip file and not an OTA update that's not recognised by GNQC.


2. If you are not able to click on Choose Path Button in Step#7, it means you have not connected your Qualcomm Based Android Device to the computer. Connect the phone and try again.


3. This flashing process will wipe out all your data. If need be, make a backup before you proceed.


Helpful Links

How to Flash Tecno Android Devices

How to Flash iTel Android Devices

How to Flash GSmart Gigabyte Android Devices


How to Flash Intel Powered Android Device Using Intel Phone Flash Tool: Lenovo, Asus and Others

If you are amidst the need to service your Intel Powered android device and could not find any help useful as such, relax! This might really help you.

Here, I discuss the step by step process of flashing your Intel Powered android devices using Intel Phone Flash Tool. This Intel Phone Flash Tool can flash stock ROM on any Intel Powered android device so long as the ROM structure is in the right format.


Brief Note and Page Content Menu
NotePage Content Menu
This tutorial is made specifically for those who have purchased the A B C Package. A B C Package is a special phone software repair package prepared for every individual who wish to learn solutions to various phone software problems and perhaps, start practicing mobile phone software repairs hence; earning living in the cause. Details about A B C Package is here

Introduction to Flashing and the Related Terms

1. Flashing is the process of reverting your device, in this case, any Intel Powered smartphones back to its factory defaults by means of flashing STOCK firmware on it. It can also be accomplished by means of flashing Custom ROM/Firmware on it.

Flashing is done to correct any software malfunctions experienced on any android devices. Even those that seem persistence after performing a Factory-Reset would be corrected by flashing the device.


Intel Powered smartphones include Lenovo, Asus, some Gionee and other android devices you know off. All of these mentioned devices can be flashed using Intel Phone Flash Tool.


How to Flash Intel Powered Android Device Using Intel Phone Flash Tool

1. Download and extract Intel Phone Flash Tool and Intel Phone Drivers. The download links for both files are found in the Download Section here.


2. Once extracted, open the folder wherein you extracted the files. You should see the drivers' folder. Open it and install both Intel Phone Drivers found in the folder.


Intel Phone USB Drivers

3. Power Off your Android device.


android power menu

4. Download the specific stock ROM for the Intel powered android device you wish to flash. If it is compressed in .zip or .rar folder as most stock ROMs do, then, extract the downloaded Stock ROM on your PC.


5. Now, install Intel Phone Flash Tool on your PC. If you have not downloaded it, the download link is in the Download Section Here.


Intel Phone Flash Tool iCon

6. Lunch the Intel Phone Flash Tool. Once Intel Phone Flash Tool is launched, click on the Browse Button from the Right. See the image below.


Intel Phone Flash Tool File Browse

7. From the pop up, Locate the Flash.xml File within the folder wherein you have extracted the stock ROM you downloaded for the device and select it.


Intel Phone Flash XML File

8. Now, connect your Android smartphone to the computer. Make sure the device is still Powered Off.


9. Now, provided that the drivers are properly installed, Intel Phone Flash Tool should detect the phone and display it on the screen.


10. Now, initiate the flashing process by clicking on the Start to Flash Button to begin the Flashing Process.


Start to Flash

11. You can now sit back, relax and watch while Intel Phone Flash Tool flashes the ROM on your Intel powered Android smartphone. You can see the Flashing progress bar in the right side.


Intel Phone Flashing Progress Bar

12. When the flashing operation completes, a Done message should appear. You may then close Intel Phone Flash Tool application and disconnect your device from the computer.


Congratulations! You have now successfully flashed stock ROM on your Intel Powered Android device using Intel Phone Flash Tool.


Download Section:

Intel Phone Flash Tool and Drivers Download Link

Intel Phones Drivers


ProTIP:

1. Your Android device should have at least 40-50 percent battery charge prior to the Flashing Process.

2. Intel Phone Flash Tool can only be used to flash Intel Powered Android devices such as the ones from Lenovo, Asus and the likes.

3. Intel Phone Flash Tool should not be used to flash OTA update ROM on devices.


Helpful Links

How to Flash Tecno Android Devices

How to Flash iTel Android Devices

How to Flash GSmart Gigabyte Android Devices


Gigabyte GSmart Stock Firmware Download Links

Contained in this page are the download links for all STOCK FIRMWARE files for GSmart Gigabyte android devices. While I have done my best by carefully gathering the best Stock ROM for all major GSmart Gigabyte android devices, it is in your interest to be cautious and follow the right procedures for flashing your GSmart Gigabyte android devices using any of the flash files contained in this page.


Gigabyte GSmart Logo

Helpful Link

How to Flash GSmart Gigabyte Android Devices


Gigabyte GSmart Stock Firmware Download Links
S/NGigabyte GSmart ModelEurope VariantAsia Variant
1:Classic ProDownload Europe VariantDownload Asia Variant
2:Essence 4Download Europe VariantDownload Asia Variant
3:Classic LiteDownload Europe VariantDownload Asia Variant
4:EssenceDownload Europe VariantDownload Asia Variant
5:ClassicDownload Europe VariantDownload Asia Variant
6:Mika MXDownload Europe VariantDownload Asia Variant
7:Roma RXDownload Europe VariantDownload Asia Variant
8:Guru XDownload Europe VariantDownload Asia Variant
9:Akta A4Download Europe VariantDownload Asia Variant
10:Mika M3Download Europe VariantDownload Asia Variant
11:Roma R2Download Europe VariantDownload Asia Variant
12:Guru White EditionDownload Europe VariantDownload Asia Variant
13:T4 Lite EditionDownload Europe VariantDownload Asia Variant
14:Arty A3Download Europe VariantDownload Asia Variant
15:Mika M2Download Europe VariantDownload Asia Variant
16:GX2Download Europe VariantDownload Asia Variant
17:Saga S3Download Europe VariantDownload Asia Variant
18:T4Download Europe VariantDownload Asia Variant
19:Rey R3Download Europe VariantDownload Asia Variant
20:Alto A2Download Europe VariantDownload Asia Variant
21:GuruDownload Europe VariantDownload Asia Variant
22:Simba SX1Download Europe VariantDownload Asia Variant
23:Roma R2Download Europe VariantDownload Asia Variant
24:Sierra S1Download Europe VariantDownload Asia Variant
25:Aku A1Download Europe VariantDownload Asia Variant
26:Tuku T2Download Europe VariantDownload Asia Variant
27:Maya M1 V2NillDownload Asia Variant
28:Maya M1 V2NillDownload Asia Variant
29:Rio R1 V2NillDownload Asia Variant
30:GS202NillDownload Asia Variant
31:G1362NillDownload Asia Variant
32:G1342NillDownload Asia Variant
33:G1355NillDownload Asia Variant
34:G1345NillDownload Asia Variant
35:G1315NillDownload Asia Variant
36:G1310NillDownload Asia Variant
37:G1317DNillDownload Asia Variant

Use Read and Write Tool to Write and Flash IMEI On Qualcom, SpreadTRUM and MediaTEK Devices -Download Here

Read&Write Tool is one of the few Windows PC Tool that can flash and write IMEI on Qualcomm, MTK and SpreadTrum devices. Unlike MTK Droid Tools and WriteCode Tool that supports only MediaTek devices and SpreadTRUM Android WriteIMEI Tool which is being used for only SpreadTRUM devices.


Here, I discuss how to write/flash IMEI on either Qualcomm, MTK or SpreadTRUM android devices using Read&Write Tool on your Windows PC.


How to Write/Flash IMEI On SpreadTRUM, MediaTek and Qualcomm devices Using Read&Write Tool

Before you proceed, please note that;

  • You can only use this Read&Tool for either MediaTek, Qualcomm or SpreadTRUM powered devices.
  • You must have ADB Drivers for your device installed on your PC.
  • It is recommended that you have at least, 20 - 30 percent of battery on your device.

Now, we may proceed to the step by step instructions for flashing IMEI on either Qualcomm, MediaTek or SpreadTRUM android device using Read&Write Tool as followed.


Write or Flash IMEI using Read&Write Tool

1. Download Read&Write Tool and on your computer from the link.


2. Extract the downloaded file on your PC. Once extracted, you should see files such as the ones in the image below:


Read-Write-Application

3. Now, Open WRTool.exe preferably as admin.


Read-Write-Application

4. Once, Read&Write Tool is launched on your computer, you will see a screen such as the one in the image below:


Read Write Tool Lunched

5 Now, Open Settings by going to File > Config.


Configure Read Write Tool

6. Now, at the settings screen, look carefully on the screenshot below to choose the chipset of the phone and the COMPORT. E.g QQcomm for Qualcomm and COMPort 21 for the port.


Read Write Tool COMPort Selection

9. Now, under DataFileConfig choose BP and AP file from your device stock firmware file. These files come with the mediatek stock firmware. -these applies to only MediaTek devices.


10. In the case that your device is dual SIM, select the IMEI1 and IMEI2 then Click on OK to continue.


11. Now, Write the IMEI you wish to flash on the device in the IMEI1 and IMEI2 Box as required and appropriate. See the image below


Read Write Tool COMPort Selection

12. Now, Click on Write to begin Flashing Process.


13. As soon as Read&Write Tool is done writing or Flashing the IMEI on the device you will see a green Pass message.


CONGRATULATIONS! You have just successfully flashed new IMEI on your device.

How to Flash GSmart Gigabyte Android Devices

Gigabyte smartphones now commonly known as GSmart produces smartphones, tablets and Notes running either Android OS or Windows Mobile OS.

In this tutorial, I will be discussing how to flash your GSmart ( Gigabyte ) android devices from the stock recovery. And later, when I complete my work on the Windows PC tool that can be used to flash and unbrick GSmart ( Gigabyte ) android device, I shall discuss that, too. So, stay tunned.


Gigabyte GSmart Logo

As common with every gadgets, there are times when these devices would develop faults, either software or hardware. Of course, you would need to service it. -that's exactly why this tutorial is here.


This tutorial is made specifically for those who have purchased the A B C Package. A B C Package is a special phone software repair package prepared for every individual who wish to learn solutions to various phone software problems and perhaps, start practicing mobile phone software repairs hence; earning living in the cause. Details about A B C Package is here.

WHAT IS FLASHING?

Flashing is the process of reverting your device, in this case, Gigabyte/GSmart android device to its factory defaults by means of flashing STOCK GSmart/Gigabyte firmware on it. It can also be accomplished by means of flashing Custom ROM/Firmware on it.

Flashing is done to correct any software malfunctions experienced on any Gigabyte/GSmart android devices. Even those that seem persistence after performing a Factory-Reset would be corrected by flashing the device.


Unlike the MTK android devices, the procedures for flashing Gigabyte or GSmart android devices via the stock recovery is straight therefore, I would dive straight to the flashing exercise.

Now, shall we proceed?


1: DEFINITIONS OF TERMS USED

Before we begin the flashing exercise, let us do a bit of introduction by introducing ourselves to the terms to be identified while flashing GSmart android device.

  • OS VERSION: this refers to the version of the firmware for which you have and that that you are going to use to flash the GSmart android device.
  • MODEL VARIANTS: usually, there are different variant(s) of some GSmart android devices, most commonly, CZech and Asia variants.
  • FIRMWARE: GSmart Gigabyte firmware is usually compressed and packed in a compressed zip file. This file, when flashed on GSmart android devices, contains all the images, GUI and the entire files necessary to run android OS on your GSmart android device.
Flashing can upgrade or downgrade your GSmart android device. It all depends on the versions of the firmware you used while flashing the phone.

Helpful Link:

You can download GSmart Gigabyte Android Firmware From Here: GSmart Gigabyte Stock Firmware Download Links


HOW TO FLASH Gigabyte GSmart ANDROID DEVICE FROM STOCK RECOVERY


1: Download the specific firmware for the GSmart Gigabyte android device from the link above.


2: Decompress or unzip the downloaded firmware on your PC or wherever you have downloaded it.


3: In the folder wherein you have decompressed the downloaded firmware, you should see two (2) such as seen in the image below. Copy both of them to the root of your SD Card.


Gigabyte GSmart Stock ROM Structure

4. Slot/Insert the SD Card in the phone and then, Power Off the phone.


5: Press and Hold the Vol + key while the Power Button is pressed then, release the Vol + as soon as the android icon appears on the phone screen.


Gigabyte GSmart Android iCon

6: Now, the phone should automatically detect the loaded firmware. Follow the prompt and let the flashing operation begin.


Gigabyte GSmart Flashing

DO NOT interrupt the flashing operation until it is completed!


7: As soon as the flashing operation is complete, GSmart logo will appear on the phone and reboot.


CONGRATULATIONS! You have now successfully flashed your GSmart Gigabyte android device.

Lenovo A760 MiUi v5 Custom ROM Download | Android 4.4.2

Here is a fully functional MiUi v5 ROM port for Lenovo A760 for some of us who are willing to experience MiUi ROM on Lenovo android devices, here is one for your A760. Although, personally, I have not flashed this ROM yet thought I wish I could but I do not have Lenovo A760 to run it on. However, going by the comments, this ROM is close to perfect!


Lenovo A760
DISCLAIMER: this ROM was not developed by ArykTECH. Please, install it at your own discretion. Although, I may provide some assistance if you have issues with the ROM; I do not give guarantee of any kind.

Installing this ROM On your Lenovo A760

Prior to Installation, please note:
  • Backup your complete ROM before installing this so that you may be able restore your ROM if you have any reason to do so.
  • Flashing this ROM may have adverse effect on your Lenovo A760 if proper care is not taken.
  • This ROM is specifically meant for Lenovo A760. Flashing it on any other android device may spell disaster for that device.

MiUi V5 Features that Work On this ROM On your Lenovo A760

  • MiUi Instant Music Player Switch on Lockscreen works fine. Just Double-tap the center of the lockscreen to bring up Mi Music Player.
  • FTP File Transfer. You can transfer your files using FTP server via the native MiUi File Manager.
  • Silent Repeated Calls feature is working fine also.
  • Bar Layout option in the notification area.
  • Native MiUi Browser Desktop Mode working fine.
  • Data Usage Limit lets you manage your data better.
  • Browser Night Mode active.
  • Hand Held Twilight Mode in camera now working fine.
  • Native MiUi Theme supported. More themes can also be downloaded from the MiUi online wallpapers.
  • Other MiUi v5 features not listed here are also working fine.
  • Noticed any bugs? You may report it via the comment system

Creadit(s):- MiUi Community


MiUi v5 ROM Layouts

How To Install this ROM on your Lenovo A760

1. Download this MiUi v5 ROM for your Lenovo A760 from here.
2. Copy or move the downloaded ROM to your SD Card
3. Reboot the phone to recovery. NOTE: It has to be custom recovery.
Helpful Link:

4. Factory Reset the phone from recovery, wipe cache, delvic and then, flash the ROM.
5. Wait few minutes until the flashing operation is complete and then, reboot the phone.


Lenovo A766 MiUi v5 Custom ROM Download | Android 4.4.X

If you are one of those android devices users always looking out for new things to try on your android device and you have Lenovo A766, here is a wonderful ROM for you! This ROM is an MiUi v5 unofficial custom ROM based on android 4.4 source. Though unofficial, the ROM is loaded with enough features that will give your Lenovo A766 a completely new look, feel and taste.


Lenovo A766
DISCLAIMER: this ROM was not developed by ArykTECH. Please, install it at your own discretion. Although, I may provide some assistance if you have issues with the ROM; I do not give guarantee of any kind.

Installing this ROM On your Lenovo A766

Prior to Installation, please note:
  • Backup your complete ROM before installing this so that you may be able restore your ROM if you have any reason to do so.
  • Flashing this ROM may have adverse effect on your Lenovo A766 if proper care is not taken.
  • This ROM is specifically meant for Lenovo A766. Flashing it on any other android device may spell disaster for that device.

MiUi V5 Features that Work On this ROM On your Lenovo A766

  • MiUi Instant Music Player Switch on Lockscreen works fine. Just Double-tap the center of the lockscreen to bring up Mi Music Player.
  • FTP File Transfer. You can transfer your files using FTP server via the native MiUi File Manager.
  • Silent Repeated Calls feature is working fine also.
  • Bar Layout option in the notification area.
  • Native MiUi Browser Desktop Mode working fine.
  • Data Usage Limit lets you manage your data better.
  • Browser Night Mode active.
  • Hand Held Twilight Mode in camera now working fine.
  • Native MiUi Theme supported. More themes can also be downloaded from the MiUi online wallpapers.
  • Other MiUi v5 features not listed here are also working fine.
  • Noticed any bugs? You may report it via the comment system

Creadit(s):- MiUi Community


MiUi v5 ROM Layouts

How To Install this ROM on your Lenovo A766

1. Download this MiUi v5 ROM for your Lenovo A766 from here.
2. Copy or move the downloaded ROM to your SD Card
3. Reboot the phone to recovery. NOTE: It has to be custom recovery.
Helpful Link:

4. Factory Reset the phone from recovery, wipe cache, delvic and then, flash the ROM.
5. Wait few minutes until the flashing operation is complete and then, reboot the phone.


Lenovo A789 MiUi v4 Custom ROM Download | Android 4.2.2

With most bloatwares and other useless stock apps that usually consume space that should be occupied by your own personlized apps removed, this MiUi unofficial custom ROM for your Lenovo A789 will give you a beatiful experience. This ROM is an MiUi v4 unofficial custom ROM based on android 4.2.2 JellyBean source. Though unofficial, the ROM is loaded with enough features that will give your Lenovo A789 a completely new look, feel and taste.


Lenovo A789
DISCLAIMER: this ROM was not developed by ArykTECH. Please, install it at your own discretion. Although, I may provide some assistance if you have issues with the ROM; I do not give guarantee of any kind.

Installing this ROM On your Lenovo A789

Prior to Installation, please note:
  • Backup your complete ROM before installing this on your Lenovo A789 so that you may be able restore your ROM if you have any reason to do so.
  • Flashing this ROM may have adverse effect on your Lenovo A789 if proper care is not taken.
  • This ROM is specifically meant for Lenovo A789. Flashing it on any other android device may spell disaster for that device.

MiUi v4 Features that Work On this ROM On your Lenovo A789

  • FTP File Transfer. You can transfer your files using FTP server via the native MiUi File Manager.
  • Silent Repeated Calls feature is working fine also.
  • Native MiUi Browser Desktop Mode working fine.
  • Data Usage Limit lets you manage your data better.
  • Browser Night Mode active.
  • Native MiUi Theme supported.
  • Other MiUi v4 features not listed here are also working fine.
  • Noticed any bugs? You may report it via the comment system

Creadit(s):- MiUi Community


MiUi v4 ROM Layouts

How To Install this ROM on your Lenovo A789

1. Download this MiUi v4 ROM for your Lenovo A789 from here.
2. Copy or move the downloaded ROM to your SD Card
3. Reboot the phone to recovery. NOTE: It has to be custom recovery.
Helpful Link:

4. Factory Reset the phone from recovery, wipe cache, delvic and then, flash the ROM.
5. Wait few minutes until the flashing operation is complete and then, reboot the phone.


Download WriteCode Tool to Write New IMEI On All Mediatek Devices: Tecno, Infinix, Lenovo and Others

WriteCode is one of the simplest tools for writing IMEI on MTK android devices. This include Tecno, Infinix, Gowin, Blue, Gionee, Wiko and other android devices powered with Mediatek chipset

WriteCode does not only allows you to flash IMEI on Mediatek smartphone Devices but also Feature Phones. For as long as it is Mediatek chipset, WriteCode is a go for writing or flashing IMEI on such device.


Here, on this page we are going to explain in details, the features of WriteCode IMEI Tool and how to use it to write or flash IMEI on MTK android devices and other Mediatek powered devices.


WriteCode -MTK Android IMEI Write Tool

Features of WriteCode Tool

  • Supports for Mediatek Devices
  • WriteCode can write IMEI on MTK devices without the Database Files
  • WriteCode ca also Write BSN Database, RF Database and Read Calibre Database of your Mediatek devices.

How to Use WriteCode Tool to Write IMEI On MTK Android Devices

1. Download WriteCode Tool from here.


2. Unzip the downloaded file on your desktop.


3. Open the folder, locate WriteCode Tool application and lunch it as Admin.


4. Enable USB Debugging on your MTK android device and connect it to the PC.


5. Click Write IMEI and wait until the process completes then, disconnect your phone.


Congratulations! You just successfully flashed or write IMEI on your MTK android device using WriteCode Tool.


It is illegal to change the IMEI of your device. Beware and use at your own discretion.

Lenovo A750 MiUi v5 Custom ROM Download | Android 4.4.X

Being one of the rearest but trusted custom ROM available, MiUi ROM is not available for most android devices as such but, Lenovo A750 is one of those Lenovo android devices that has had MiUi ROM port. Here, I am sharing with you an unofficial MiUi V5 custom ROM for Lenovo A750 which you can download and flash on your device by following the guides herein.


Lenovo A750
DISCLAIMER: this ROM was not developed by ArykTECH. Please, install it at your own discretion. Although, I may provide some assistance if you have issues with the ROM; I do not give guarantee of any kind.

Installing this ROM On your Lenovo A750

Prior to Installation, please note:
  • Backup your complete ROM before installing this so that you may be able restore your ROM if you have any reason to do so.
  • Flashing this ROM wrongly may render your phone useless.
  • This ROM is specifically meant for Lenovo A750. Flashing it on any other android device may spell disaster for that device.

MiUi V5 Features that Works On this ROM On your Lenovo A750

Before flashing this ROM, it would be a good idea for you to scan through the features of the ROM which are listed below;


  • MiUi Instant Music Player Switch on Lockscreen works fine. Just Double-tap the center of the lockscreen to bring up Mi Music Player.
  • FTP File Transfer. You can transfer your files using FTP server via the native MiUi File Manager.
  • Silent Repeated Calls feature is working fine also.
  • Bar Layout option in the notification area.
  • Native MiUi Browser Desktop Mode working fine.
  • Data Usage Limit lets you manage your data better.
  • Browser Night Mode active.
  • Hand Held Twilight Mode in camera now working fine.
  • Native MiUi Theme supported. More themes can also be downloaded from the MiUi online wallpapers.
  • Other MiUi v5 features not listed here are also working fine.
  • Noticed any bugs? You may report it via the comment system

Creadit(s):- MiUi Community


MiUi v5 ROM Layouts

How To Install this ROM on your Lenovo A750

1. Download this MiUi v5 ROM for your Lenovo A750 from here.
2. Copy or move the downloaded ROM to your SD Card
3. Reboot the phone to recovery. NOTE: It has to be custom recovery.
Helpful Link:

4. Factory Reset the phone from recovery, wipe cache, delvic and then, flash the ROM.
5. Wait few minutes until the flashing operation is complete and then, reboot the phone.


Advertisement


Similar Tutorials


Lenovo A670t MiUi v5 Custom ROM Download | Android 4.4.2

Though MiUi is not so common a ROM in that part of the world, it is one of the best custom ROM available yet. Here is an unofficial MiUi V5 custom ROM for Lenovo A670t. Though unofficial, this ROM is fully functioanl going by the comments from other Lenovo A670t users who have used this ROM, it works perfectly for the Lenovo A670t featuring all the MiUi v5 features.


Lenovo-a670t-MiUi ROM Lockscreen
DISCLAIMER: this ROM was not developed by ArykTECH. Please, install it at your own discretion. Although, I may provide some assistance if you have issues with the ROM; I do not give guarantee of any kind.

Installing this ROM On your Lenovo A670t

Prior to Installation, please note:
  • Backup your complete ROM before installing this so that you may be able restore your ROM if you have any reason to do so.
  • Flashing this ROM wrongly may render your phone useless.

MiUi V5 Features that Works On this ROM On your Lenovo A670t

Before flashing this ROM, it would be a good idea for you to scan through the features of the ROM which are listed below;


  • Instant Music Player Switch. Double-tap the center of the lockscreen to bring up Mi Music Player.
  • FTP File Transfer. Transfer your files using FTP server via the native MiUi File Manager.
  • Silent Repeated Calls feature is working fine.
  • Bar Layout option in the notification area.
  • Native MiUi Browser Desktop Mode working fine, too.
  • Data Usage Limit lets you manage your data better.
  • Browser Night Mode active.
  • Hand Held Twilight Mode in camera.
  • Native MiUi Theme supported. More themes can also be downloaded from the MiUi online wallpapers.
  • Other MiUi v5 features not listed here are also featured.

Creadit(s):- MiUi Community


MiUi v5 ROM Layout

How To Install this ROM on your Lenovo A670t

1. Download this MiUi v5 ROM for your Lenovo A670t from here.
2. Copy or move the downloaded ROM to your SD Card
3. Reboot the phone to recovery. NOTE: It has to be custom recovery.
Helpful Link:

4. Factory Reset the phone from recovery, wipe cache, delvic and then, flash the ROM.
5. Wait few minutes until the flashing operation is complete and then, reboot the phone.


Advertisement

Similar Tutorials


Lenovo A660 MiUi v5 Custom ROM Download | Android 4.4.2 Lolipop

Lenovo A660 is one of the few Lenovo android devices that are lucky to have MiUi v5 ROM ported for them and here is an unofficial MiUi V5 custom ROM for Lenovo A660. Though unofficial, this ROM is fully functioanl with little known bugs, it works perfectly for the Lenovo A660 featuring all the MiUi v5 features.


Lenovo a660
DISCLAIMER: this ROM was not developed by ArykTECH. Please, install it at your own discretion. Although, I may provide some assistance if you have issues with the ROM; I do not give guarantee of any kind.

Installing this ROM, MiUi V5 On your Lenovo A660

Prior to Installation, please note:
  • Backup your complete ROM before installing this so that you may be able restore your ROM if you have any reason to do so.
  • Flashing this ROM wrongly may render your phone useless.

Features of this MiUi V5 ROM that Works On your Lenovo A660

Before flashing this ROM, it would be a good idea for you to scan through the features of the ROM which are listed below;


  • Instant Music Player Switch. Double-tap the center of the lockscreen to bring up Mi Music Player.
  • FTP File Transfer. Transfer your files using FTP server via the native MiUi File Manager.
  • Silent Repeated Calls feature is working fine.
  • Bar Layout option in the notification area.
  • Native MiUi Browser Desktop Mode working fine, too.
  • Data Usage Limit lets you manage your data better.
  • Browser Night Mode active.
  • Hand Held Twilight Mode in camera.
  • Native MiUi Theme supported. More themes can also be downloaded from the MiUi online wallpapers.
  • Other MiUi v5 features not listed here are also featured.

Creadit(s):- MiUi Community


MiUi v5 ROM Layouts

How To Install this MiUi V5 ROM on your Lenovo A660

1. Download this MiUi v5 ROM for your Lenovo A660 from here.
2. Copy or move the downloaded ROM to your SD Card
3. Reboot the phone to recovery. NOTE: It has to be custom recovery.
Helpful Link:

4. Factory Reset the phone from recovery, wipe cache, delvic and then, flash the ROM.
5. Wait few minutes until the flashing operation is complete and then, reboot the phone.


Advertisement


Similar Tutorials


Lenovo A630T MiUi v5 Custom ROM Download | Android 4.4.2

Here is an unofficial MiUi V5 custom ROM for Lenovo A630t. Though unofficial, this ROM is fully functioanl with little known bugs, it works perfectly for the Lenovo A630t featuring all the MiUi v5 features.


Lenovo-a630t
DISCLAIMER: this ROM was not developed by ArykTECH. Please, install it at your own discretion. Although, I may provide some assistance if you have issues with the ROM; I do not give guarantee of any kind.

Installing this ROM, MiUi V5 On your Lenovo A630t

Prior to Installation, please note:
  • Backup your complete ROM before installing this so that you may be able restore your ROM if you have any reason to do so.
  • Flashing this ROM wrongly may render your phone useless.

Features of this MiUi V5 ROM that Works On your Lenovo A630t

Before flashing this ROM, it would be a good idea for you to scan through the features of the ROM which are listed below;


  • Instant Music Player Switch. Double-tap the center of the lockscreen to bring up Mi Music Player.
  • FTP File Transfer. Transfer your files using FTP server via the native MiUi File Manager.
  • Silent Repeated Calls feature is working fine.
  • Bar Layout option in the notification area.
  • Native MiUi Browser Desktop Mode working fine, too.
  • Data Usage Limit lets you manage your data better.
  • Browser Night Mode active.
  • Hand Held Twilight Mode in camera.
  • Native MiUi Theme supported. More themes can also be downloaded from the MiUi online wallpapers.

Creadit(s):- MiUi Community


MiUi ROM v5 Layouts

How To Install this MiUi V5 ROM on your Lenovo A630t

1. Download this MiUi v5 ROM for your Lenovo A630t from here.
2. Copy or move the downloaded ROM to your SD Card
3. Reboot the phone to recovery. NOTE: It has to be custom recovery.
Helpful Link:

4. Factory Reset the phone from recovery, wipe cache, delvic and then, flash the ROM.
5. Wait few minutes until the flashing operation is complete and then, reboot the phone.


Advertisement


Similar Tutorials


How to Root Samsung Galaxy S7 and S7 Edge

If you are thinking of rooting your Samsung Galaxy S7 or S7 Edge, you might still be consodering the fact that the phone is still much recent in the market so, there may not be a root exploit for it yet, but; come to think of it, we already have custom recovery for the Galaxy S7 and S7 Edge. See here: How to Flash TWRP 3.0 On Galaxy S7 and S7 Edge. - I bet you don't expect that this early!


For those that may not know, ROOTing in android, is the process of obtaining root access privileges. This gives you the ability to do just more than an ordinary android user.

Now, to root your Samsung Galaxy S7 and S7 Edge, there are few methods and I shall discuss them in detail here.

3 Possible Methods for Rooting Samsung Galaxy S7 and S7 Edge

1. One Click Root Apps: if you are an avid android device user, especially; one that loves rooting, you must be familiar with One-Click Root apps.
Talking of One-Click Root apps for android devices, these are the apps that you can ordinarily install on your android device, lunch and run them to gain root access.

In these category of apps, we have KingRoot topping the list and then, followed by Kingoroot.

Just as they are similar by name, their interfaces and functions are also very similar.

How to Use KingRoot to Root your Samsung Galaxy S7 and S7 Edge

  • Download Kingroot application from here and install it on your Samsung S7.
  • Lunch the app on your phone and make sure you are connected to the internet by this time.
  • Wait few seconds for the app to dectect your phone's make and model and few other data about the phone.
  • Tap Attempt Root or Try Root depending on the version you download. I recommend you download the latest Kingroot app.
  • From here, the whole of the process is automatic. Simply hold-on, wait for the app to complete its work. Attend to whichever Prompts the app may bring.
  • When its writes Successful in green ink and mark, congratulations! Your Samsung Galaxy S7 had just been rooted.
The success rate for One-Click Root apps for devices running Android Mashmallow (6.0.1) is well below 50% for now.
Helpful Link:
2. CF-Auto-Root: CF-Auto-Root is a more reliable method for rooting not only Samsung Galaxy S7 but also, most Samsung android devices and Nexus android devices. CF Autoroot has been around for relatively a long time now.
While Kingroot and other One-Click Root Apps are faster, CF-Auto-Root method is older, better and more trusted. It is created and developed by Chainfire, who periodically updates the tools and includes new devices from time to time.

Just like every other root exploits, CF Auto-Root installs SuperSU?. You can check the CF-Auto-Root page here for your phone variant, SM-G930F, SM-G935F or whatever your model is. Download the tool and flash it on your Galaxy S7.
Helpful Link:
3. Flash SU Manager Via Recovery: if you have successfully installed TWRP Custom Recovery on your Samsung Galaxy S7 and S7 Edge from here, then, you have a better chance of rooting your Galaxy S7 and S7 Edge from the recovery.

This is a much better and safer chance of rooting your Samsung Galaxy S7.

How to Root your Samsung Galaxy S7 from the Recovery

1. Download Chainfire SU Manager for Android 6.0.1 from here and put it in the root of your SD Card/phone storage.

2. Boot your Galaxy S7 to recovery. Remember, it has to be custom recovery.

3. Perform a FULL Backup of your Galaxy S7 (*important!) from the recovery. This has to be done in case anything goes wrong.

4. Click on Install and navigate to select the SU Manager downloaded from the link above and flash it.

5. Reboot your phone. When the phone is booted, check your app-drawer to see SuperSU and enjoy!

Have you successfully rooted your Samsung Galaxy S7? Share your after-root experience in your comment!

Advertisement

Similar Tutorials


How to Install Android N On Windows PC Using Emulator

Early last week, the Developer preview of the Android N was released for selected Nexus Android devices. If you have a Nexus android device and wish to install the developers preview of the Adroid N before it released for the general public, see here: Android N Developer Preview for the Nexus Android Devices Image Released
For some us die-hard Android users who wish to try out the all-new Android N but do not have Nexus device, if you have a Windows PC; that's a good start as well. You can emmulate the Android N on your Windows PC to have a very detailed experience of the Android N on your PC just as you would on your phone.

To do this, you only need to download Android SDK and Android N firmware image on your PC. Using Android Emulator, AVD? you can then use the Android N firmware on your Windows PC.

How to Install Android N On your Windows PC Using Emulator

1. Download Android SDK Manager from here. Once the file is downloaded, double-click on it to install the program on your Windows PC and then, lunch it.

2. On Android SDK Manager, search under Tools for Android N (API 23, N Preview), double-click on it and select the third box. Click on “Install Packages”.

3. On the set-up screen that appears agree to the packages’ licenses. Then click “Install”.

4. Now go back to the folder where you installed Android SDK Manager and double-click on “ADV Manager.exe”.

Running Android N Emulator On Windows PC after Installation

1. Locate the “Create” button on the right side and Click it.

2. Setting your specifications, create a new Android Virtual Device and then click OK.

3. Now, your newly created Android Virtual Device is ready for lunch. Select it and click on “Start”.
Almost immediately, a black screen will show up with Android N booting up. Depending on your computer speed, the first boot might take a while.
Just patiently wait while the PC prepares the Android N emmulator for the first use.

Advertisement


Similar Tutorials