NVRAM WARNING err 0x10 Solution for All MTK Android

This article addresses the NVRAM WARNING err 0x10 problem most MTK android device users are facing immediately after formatting the whole flash by SP Flash Tool.


In this article, I discuss a one-click solution to put stop to the NVRAM WARNING err 0x10 problem, however, your device need be rooted for this solution to work for you.


Once your android device is rooted, you will find this method as easy as flashing any mod via Xposed Installer.


How to Stop NVRAM WARNING err 0x10 Problem On MTK Android

Since I ave mentioned that you need to root your MTK android device to carry out this operation, you probably know that we will be making use of some root applications which include the followings;

Stopping the NVRAM WARNING err 0x10

1. Root your MTK Android device. You may use Kingroot which is the number One-click root application to root your MTK Android device without PC. See here: Download Kingroot: One-click Root Application [All Versions]


2. Once your MTK Android device is rooted, download and install Root Explorer from here.


3. Open Root Explorer and navigate to File system root/ data/nvram/APCFG/APRDEB

There you will find these files;

    1. WIFI

    2. WIFI_CUSTOM

Simply delete these files


4. Now extract the files from the WiFi fix.rar whose download link is provided above and move the extracted files to the previous root/ data/nvram/APCFG/APRDEB folder so that it will replace the once you have deleted.

5. Finally, reboot your device.

By now, if you go to the wifi adapter setting, you should find that the err message of NVRAM Error Warning is gone.


If this piece of info was useful to you, please share to help others.

Also, follow us on Facebook here, Twitter here and Google+ here.


How to Make ADB Detect, Read and Connect SpreadTRUM Android Device

This article addresses the issues you have when your SpreadTRUM android device is not being detected by ADB either in Command Prompt or any other development program. SpreadTRUM android device include iTel, Micromax and other android devices powered with SpreadTRUM chipset.


Android Debug Bridge popularly known as ADB, as could be deduced from the name, is the bridge between your android device and your PC. Thus, whenever there is need to correct certain errors on android device, perform enhancement activities or anything that involves connecting the android device to your PC and communicate via ADB; you need to make sure that the communication really flows freely all through.


How to Make ADB Detect SpreadTRUM Android Device

In the case that your SpreadTRUM android device does not communicate with your PC, eirther that you are getting:

  • Device Offline Message
  • Device List Empty

In command prompt, here is what to do:


1. Setup ADB Folder on your PC. And make sure you're using the lastest ADB Tools. See the helpful link section on how to setup ADB Tools on your PC.


2. Install SpreadTRUM USB Drivers on your PC.


3. Make sure the USB Cable you are using is compatible with the device and that, it can syncronise.


4. Enable USB Debugging on the phone from Developer Options.

    NOTE: if Developer Options is not in the phone go to Settings >> About and tap Build Number continuosly for upto 7-times or until it says; "You're now a developer".


If after that, your computer is still unable to communicate with your SpreadTRUM android device, then; you need to try this hack:


1. Go to My Computer C:/Users > your_Windows-User >> .android


2. Open .android folder above. In it, you should see adb_usb.ini


3. Open adb_usb.ini using Notepad++


4. Add the code below in it.


0x1782

NOTE: the code above is the Vendor ID for SpreadTRUM Android devices. It should be written on another line as if you're starting a new paragraph.


5. Save the file and lunch Command Prompt again in your ADB Tools folder. See here: How to Point Command Prompt to ADB Tools Folder

6. In command prompt, type the Command;


adb devices

You may get a response as shown in the image below:


adb device offline

The response shows offline because you have not granted ADB Permission on the device. Look at your phone screen and accept the notification prompt.


7. Run the command below again in command prompt;


adb devices

You may now get the response shown in the image below.


adb device list

NOTE: if you get the offline message again, then, type the command below in Command Prompt before you issue adb devices again.


adb kill-server

NOTE: Press Enter after every command you issue in Command Prompt.


Now, everything should work normally between your PC and your SpreadTRUM android device.


Helpful Links:

How to Setup ADB Tools On Windows PC


How to Hard Reset Samsung Galaxy G530 Grand Prime

If you need to Factory Reset or Hard Reset your Samsung Galaxy G530 Grand Prime, depending on the current condition of the device; here is how to Hard Reset or Factory Reset your Galaxy Grand Prime.


Hard Reset is the process of reverting your phone's settings to its factory defaults using some key combinations without going through the phone settings before doing so. While Factory Reset is the process of resetting your phone to its factory default settings while the phone is on Android Mode.


The end result of both method is to clear or wipe off your phone, in this case, your Samsung Galaxy G530 Grand Prime.


Helpful LinksRelated Links

Here is how to Hard Reset or Factory Reset your Samsung Galaxy G530 Grand Prime. For whatever reason, you will find either of the methods discussed here useful in factory resetting your Galaxy Grand Prime.


Galaxy G530 Grand Prime

Before YOU Proceed!

Either of these processes will cost you all the contents on your phone including your installed apps, SMS, MMS, Pictures, Videos and Movies (stored on phone's memory).

Therefore; endeavor to backup the necessary files before you proceed.


How to Hard Reset your Samsung Galaxy G530 Grand Prime

1. Turn off your Samsung Galaxy G530 Grand Prime or remove the battery from it.


2. Now, press and hold Volume Up + Power + Home keys until Samsung logo appears on your phone's screen then, release the Power button.


3. When android logo appears on the screen, release the rest of the keys.


4. Now, you should be in the android recovery screen. Using the Volume Buttons, navigate to Wipe Data/Factory Reset and select it using the Power button.


4. The next screen shows you several NOs with a YES....

Navigate to "Yes" from the options, and select it using the Power button.


5. Wait while the phone resets.

Now select the option "reboot system now" using Power button.


You have now successfully reset your Samsung Galaxy G530 Grand Prime to its factory default settings.


Galaxy J1 Recovery Screen

How to Factory Reset your Samsung Galaxy G530 Grand Prime

1. If the display is off, using the power button, turn the phone on.


2. Navigate to Menu and then, Settings.


3. From there, locate Factory Data Reset and tap it.


4. From the screen, choose Reset Phone.

Confirm the action by tapping Erase everything.


Wait while the phone is reset and by that, you have successfully factory reset your Samsung Galaxy G530 Grand Prime.


If this piece of info was useful to you, please share to help others.

Also, follow us on Facebook here, Twitter here and Google+ here.


Download and Upgrade Tecno Camon C8 to Android 6.0 Marshmallow [Latest Update]

For some of us that have being waiting for the Android 6.0 Marshmallow for Tecno Camon C8 to arrive, here is a good news. Tecno has finally released android 6.0 Marshmallow update for the Tecno Cammon C8 and you can follow the step by step instructions here to upgrade your Tecno Camon C8 to android 6.0 Marshmallow.


This android 6.0 Marshmallow update for the Tecno Camon C8 has been updated to the bugless version because the earlier update by Tecno contains a lots of bugs.

Tecno Camon C8

But then, if you still wish to download and try it out, this step by step guide will help you upgrade your Camon C8 to android 6.0 Marshmallow.


You can now safely upgarde your Tecno Camon C8 to Android 6.0 Marshmallow following the step by step guides given hereunder.


How to Upgrade your Tecno Camon C8 to Android 6.0 Marshmallow

If you are willing to upgrade your Tecno Camon C8 to Android 6.0 Marshmallow, simply follow the step by step guides that follow hereunder.


But, then, before you proceed, make sure that you have;

    * Make a complete Backup of your entire ROM.

    * Unroot your Camon C8 if it is rooted. [Check the helpful links below for how].

    * Make sure you are having STOCK Recovery on your Camon C8.


Upgrading your Tecno Camon C8 to Android 6.0 Marshmallow

1. Download the Recovery_Flashable zip file of the Android 6.0 Marshmallow update for the Tecno Camon C8 from the Download Section of this page.


2. Save the zip file to the root directory of your SD Card and slot it in the phone.


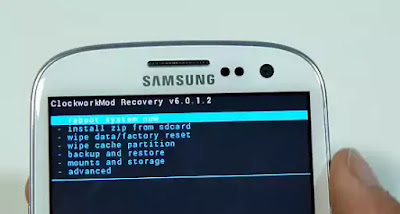
3. Boot the phone to recovery mode.

NOTE: it has to be Stock Recovery.


4. Select Install from SD Card.


5. Navigate to the ROM Update file you just downloaded and select it. Confirm it with Yes.


6. Wait few seconds until the operation is complete and then, reboot.


Download Section:

Tecno Camon C8 Android 6.0 Marshmallow Update Download Link


Helpful Links:

How to Unroot Android Devices

Tecno HiOS UI Inside-out Look


If this piece of info was useful to you, please share to help others.

Also, follow us on Facebook here, Twitter here and Google+ here.


How to Upgrade Tecno Camon C8 UI to HiOS: New Tecno UI

For some of us that have not gotten HiOS on our Tecno Camon C8 and would love to, an OTA update is now available and the ZIP file can be flashed from the recovery to upgrade your Camon C8 UI to the new Tecno HiOS UI.


Tecno HiOS UI

What is HiOS?

HiOS is the new Tecno theming system similar to the Infinix XUI, Huawei's EMUI and the HTC Sense.

These are stockify (Stock-like) lunchers made specifically by the phone's manufactural to give their smartphones unique look and feel.


How to Upgrade your Camon C8 to HiOS?

If you are willing to upgrade your Tecno Camon C8 to the new HiOS, simply follow the step by step guides that follow hereunder.


But, then, before you proceed, make sure that you have;

    * Make a complete Backup of your entire ROM.

    * Unroot your Camon C8 if it is rooted. [Check the helpful links below for how].

    * Make sure you are having STOCK Recovery on your Camon C8.


Upgrading your Camon C8 UI to HiOS

1. Go to Settings >> About >> Build Number and note down your Camon C8's build number.


2. Go to Settings >> About >> System Updates.

From there search, download and install all pending Over the Air (OTA) updates. NOTE: you need internet connection to carryout this operation.


3. Download the SD Card update file of the HiOS file from the download section below here. The download link for both build of the Camon C8 is present there.


4. Once download is complete, save the downloaded file to the root of your SD Card.


5. Reboot the phone into recovery mode.


6. From the recovery, select Install ZIP from SD Card. Scroll to select the ZIP File you downloaded and Yes to confirm it.


7. Wait few minutes until the flashing operation is complete and then, reboot the phone.


Download Section:

HiOS Download Link for Camon C8: [Build C8-H352-A2-L-20160118]

HiOS Download Link for Camon C8: [Other Build Numbers]


Helpful Links:

How to Unroot Android Devices

Tecno HiOS UI Inside-out Look

How to Hard Reset Samsung Galaxy J100f

If you need to Factory Reset or Hard Reset your Samsung Galaxy J100f, depending on the current condition of the device; here is how to Hard Reset or Factory Reset your Galaxy J1.


Hard Reset is the process of reverting your phone's settings to its factory defaults using some key combinations without going through the phone settings before doing so. While Factory Reset is the process of resetting your phone to its factory default settings while the phone is on Android Mode.


The end result of both method is to clear or wipe off your phone, in this case, your Samsung Galaxy J100f.


Helpful LinksRelated Links

Here is how to Hard Reset or Factory Reset your Samsung Galaxy J100F. For whatever reason, you will find either of the methods discussed here useful in factory resetting your Samsung Galaxy J1.


Samsung Galaxy J1

Before YOU Proceed!

Either of these processes will cost you all the contents on your phone including your installed apps, SMS, MMS, Pictures, Videos and Movies (stored on phone's memory).

Therefore; endeavor to backup the necessary files before you proceed.


How to Hard Reset your Samsung Galaxy J1

1. Turn off your Samsung Galaxy J1 or remove the battery from it.


2. Now, press and hold Volume Up + Power + Home keys until Samsung logo appears on your phone's screen then, release the Power button.


3. When android logo appears on the screen, release the rest of the keys.


4. Now, you should be in the android recovery screen. Using the Volume Buttons, navigate to Wipe Data/Factory Reset and select it using the Power button.


4. The next screen shows you several NOs with a YES....

Navigate to "Yes" from the options, and select it using the Power button.


5. Wait while the phone resets.

Now select the option "reboot system now" using Power button.


You have now successfully reset your Samsung Galaxy J100f to its factory default settings.


Galaxy J1 Recovery Screen

How to Factory Reset your Samsung Galaxy J100F

1. If the display is off, using the power button, turn the phone on.


2. Navigate to Menu and then, Settings.


3. From there, locate Factory Data Reset and tap it.


4. From the screen, choose Reset Phone.

Confirm the action by tapping Erase everything.


Wait while the phone is reset and by that, you have successfully factory reset your Samsung Galaxy J1.


If this piece of info was useful to you, please share to help others.

Also, follow us on Facebook here, Twitter here and Google+ here.


Tecno HiOS UI: An Inside-out Look of it In Detail

Tecno introduces HiOS just some months ago as her official theming system for most of their recent devices. Similar to Infinix XUI and Hauwei's EMUI or the HTC Sense, Tecno HiOS is gaining ground, gradually.


Tecno HiOS UI

Presently, the Tecno HiOS is currently available for Tecno Boom J8 and an OTA (Over the Air) update of the HiOS is available for the Tecno Cammon C8. If you have Tecno Camon C8 and would love to upgrade to the HiOS, here is a tutorial on how to upgrade your Tecno Camon C8 to the HiOS theming system.


What Improvement Do you Stand to Enjoy In the HiOS UI?

Quicker Camera Activation: the new HiOS UI brings camera feature a lot more closer and friendly. Since Camera is probabaly the most frequently used feature of the smartphones, the new Tecno HiOS brings the functionality more closer for use.

To activate the Camera on a locked screen, you simply have to slide up from the locked screen and that opens the Camera app.


Simpler App Manager: with the new HiOS, you can manage your installed apps better.

Simple drag and live is all it required to re-arrange your applications.


Photo Assistant: specially made photo tunning app.


Wallpaper Swipe: to change the wallpaper of your Tecno device using the HiOS is now much easier. You only need to tap the wallpaper whenever you need to change the wallpaper.


Hi-Manager Built-in: this feature lets you easily manage your entire phone activities.


Hi-Theme: HiOS comes pre-built with several themes some of which can be downloaded at a go.


Hi-Fonts: several fonts to choose from. No need for iFont or Font manager before you can change your Tecno android device fonts again. With the Hi-Font in the HiOS, you can switch fonts at will.


Smarter Smart Dial System


Pop Incoming Call: in the HiOS UI, you can easily answer calls without having to quit or minimize whatever you are doing.


Have you had an experience with the Tecno HiOS? What are your views of it? Let's hear you in the comment.


How to Remove iCloud Lock at Setup By Yourself: iPhone and iPad 5-Steps Tricks

Here, I will discuss how possible it is for you to remove iCloud lock and deactivate Find My iPhone which is popularly known as iCloud on an iPhone or iPad during setup.


When an iPhone or iPad is being setup for the first use or after a factory reset, you're required to setup an Apple account on it which, by default, activates Apple Find My iPhone on the iPhone or iPad.


Before we go deep into discussing how to deactivate Find My iPhone or remove iCloud on an iCloud locked iPhone or iPad, I will introduce you to the Find My iPhone feature.


What is Find My iPhone?

The Find My iPhone is the feature that makes it possible for you to remotely locate and control iPhone or iPad and more importantly, it helps you secure your iPhone or iPad in the case that it is lost or stolen.


By this, I mean, if your iPhone or iPad is lost and Find My iPhone is activated on it, you can easily login your account on www.iCloud.com with your account credentials (Username and Password), locate the iPhone or iPad from there and erase it.


Once that's done, the bearer of the iPhone or iPad will be required to key in your Apple account details before the iPhone or iPad can be used again.


Can I Remove iCloud or Deactivate Find My iPhone on Locked iPhone or iPad?

Yes. You can remove iCloud from an iCloud locked iPhone or iPad and deactivate Find My iPhone on the device.


What's the Success Rate?

100%. The success rate is 100% on these conditions:

  • The email address used to setup the Apple ID is still active.
  • The original user still checks the mail either occasionally or frequently.

What if the Email is Not Active?

Since Apple A5 chip, that's roughly from iPhone 4s up, Apple has improved the iCloud services such that each Apple device system files may not be altered, at least, not easily, in anyway except the device is Jailbroken.


And this Jailbreak, on Apple devices with A5 chip and beyond, you need to enter the phone's menu before jailbreak can be achieved.


In a nutshell, if the email connected to the Apple ID is not active, removing the iCloud account and deactivating Find My iPhone on the locked iPhone or iPad is not possible.


But then, there are other backdoor methods which require extensive hacking skills and procurement of some serious hardwares -I don't think that's worth it except that you're working for a government agency.


OK. How Can I Remove iCloud and Deactivate Find My iPhone if the Email is Active?

Yes. Now, this is the main focus of this article: how to remove iCloud and deactivate Find My iPhone on a locked iPhone or iPad.


But, before I proceed, note these:

    1. These method involves tapping into information and privacy that are not yours. These acts are completely illegal therefore, do it at your own discretion.


    2. I will not name, specifically, the tools that I use. In that case, Google is your friend. Use it to find your own tools.


    3. I cannot say categorically, the time needed to accomplish the tasks since that depends on the method you choose to use and how vulnerable your victim is.

Now, having checked and understood these, you may now proceed to the step by step guides given below.


Step 1 . Get the Original Email Address Associated with the Apple ID on the device : Ordinarily, if you know the original email address used to create the iCloud Account associated with the device, you can just email the user asking him or her, politely, to remove the device from the iCloud account.


Some people will remove it while some will not. If you're not lucky, you will have no choice but to proceed to the step 2 discussed.


How Can you Get the Email Used for the Apple ID?

For now, there is only two known ways to finding original email address associated with the Apple ID used in an iPhone or iPad.


1. If the phone enters menu still, you can easily get the email address from Accounts Section, Face Time or App Store.


2. If the iPhone or iPad has been erased, your only option is to fetch the original email address using the IMEI of the device.


Using the IMEI of the iPhone or iPad, similar to how device details are fetched, some services can fetch for you, all the email addresses that have been used on the device including the dates they were used. Search Google for these services.

NOTE: you need to beware of the service you use here since majority of them are not authentic.

Step 2 : Take Control of the Email Address Associated with the Apple ID :

Since the person does not yeild, and you really want to remove the iCloud account on the iPhone or iPad and deactivate Find My iPhone on it, your next line of action is to temporarily take control of the email address from the original user.


This is easier for you than attempting to access the Apple account directly. Why? Because Apple locks Apple account following several failed attempts and once that's done, you can't remove the iCloud from the device until the account is reactivated.


How Can you Take Control of the Email Address?

    1. Social Engineer : with social engineering method, you can stay closer to the person enough to know his identities and probably trick him/her into telling you the password or using the Forgot Password feature of the email system. -this will be easier for you since you probably have known the answers to the Security Questions.


    2. Keyloggers : to do this, you need to have access to the person's PC or be able to trick the person into installing the keyloggers program on his PC.

    If you're successful at this, the program will collect the Usernames , Passwords and the weblinks on which the person uses those data and send them to your designated email address at designated time interval.


    3. Virus Trojan : you can send this powerful program (contains virus) to the person's email address. If you're lucky enough and the person opens the email, the virus automatically initializes and activates itself.

    It works just like keyloggers, the only difference is that, it is fully automated. - this is the best option you have .


    4. Phishing Method : you may learn how to setup a phishing website. Phishing, to put simply, is an exact cloned copy of another (original) website.


    You can create one and then, send a phishing email to the person's email address directing the person to click through to a cloned website.

    Once the person gets there, the person will think he is on Apple's website. Whichever data he enters there, comes to you depending on how you set the page up.


    5. IP Harvester : you can also send some IP Harvester link to the person's email address in guise. Once the person clicks the link, his IP address and few other identifiable details will be sent to you, depending on your configuration.


    Once received, you can use these details to setup your browser and access the sites in the data as if you were the person.

    Apple probably has protection against this hack, but most email servers don't.

REMEMBER : the scope of using any of the methods listed above is to get the person's password to the original email address associated with the Apple ID used on the iCloud locked iPhone or iPad.


Step 3 . Reset the Original Email Address Password :

Once you are able to access the email address, you can then reset the email address so that you will lock the person out temparily.


Step 4. Reset the Apple Account Password :

Now, using the email option in the Apple Account Password Reset system at iforgot.apple.com, reset the password for the iCloud Account.


NOTE: an email containing PASSWORD RESET conformation link will be sent to the person's email address (now in your possession), open the email and click the link to confirm it.

Step 5 . Login the Account On the iPhone or iPad :

Now that you have successfully changed the passowrd to the Apple ID associated with the iCloud account on the iPhone or iPad, you can now login using the new details you have created and deactivate Find My iPhone on the iPhone or iPad.


CAUTION:

  • This tutorial is for educational purposes only. You may use the information therein to protect yourself (from being a victim) or use it to secure your money. Either ways, use it at your own discretion.
  • If you require that it be done for you (on your behalf), I may render the service to you (at a cost). Use the contact us link to mail your intent.
  • Consider using the best option or method that you feel is accessible to you. All the methods listed above have been used and worked for me.

  • TWRP Recovery for Lenovo Vibe Z2 Pro [Download]

    Here is a TWRP 3.0.2 recovery for Lenovo Vibe Z2 Pro. You can either flash this recovery image on your Lenovo Vibe Z2 Pro using SP Flash Tool, Mobile Uncle or recovery manager and RashR.


    Lenovo Vibe Z2 Pro

    What's TeamWIN [TWRP] Recovery?

    TeamWIN Recovery which is also known as TWRP Recovery is one of the most commonly used custom recovery available for Android devices.

    Although, it is less common with MTK android devices which the Lenovo Vibe Z2 Pro belongs, TeamWIN recovery is an advanced recovery compare to most other custom recovery; most people will agree.

    This TWRP recovery port for Lenovo Vibe Z2 Pro works just fine including all the latest TWRP recovery features.


    Tecno H6 TWRP Recovery

    Features of the TWRP Recovery 3.0.2 for Lenovo Vibe Z2 Pro

      * Support for NVram backup.

      * MTP Support.

      * Boot.img backup.

      * Recovery.img backup.

      * Uboot backup.

      * Emmc repair.

      * Recovery.img and boot.img install/flash.

      * USB OTG Support.

      * More features working.

    *Disclaimer:

    This update is provided As Is.

    ArykTECH, TeamWIN Recovery or any other parties relating to the development of this Recovery.img are not responsible for your actions, thus; if your device is damaged, got bricked or any other loss you may suffer as a result of this upgrade. Upgrade at your own discretion and endeavor to follow the instructions for flashing this recovery on your Lenovo Vibe Z2 Pro carefully.

    How to Flash this Recovery.img On your Lenovo Vibe Z2 Pro


    First, decompress the downloaded recovery (if it is compressed in a zip folder) to obtain the img file of the TWRP Recovery in the folder and then, use any of the methods listed below to Flash the Recovery on your Lenovo Vibe Z2 Pro.


    1. For SP Flash Tool method, see here: How to Flash Recovery.img On MTK Android Using SP Flash.


    2. For Mobile Uncle Method, see here: How to Flash Recovery.img On MTK Android Using Mobile Uncle.


    3. For RashR Method, see here: How to Flash Recovery.img On Android Devices Using Rashr.


    Download Section:

    Download TWRP Recovery for Lenovo Vibe Z2 Pro here


    TWRP Recovery for Huawei Mate 8 [Download]

    Here is a TWRP 3.0.2 recovery for Huawei Mate 8. You can either flash this recovery image on your Huawei Mate 8 using SP Flash Tool, Mobile Uncle or recovery manager and RashR.


    Huawei Mate 8

    What's TeamWIN [TWRP] Recovery?

    TeamWIN Recovery which is also known as TWRP Recovery is one of the most commonly used custom recovery available for Android devices.

    Although, TWRP recovery is less common with Android devices such as the Huawei Mate 8, it is an advanced recovery compare to most other custom recovery; most people will agree.

    This TWRP recovery port for Huawei Mate 8 works just fine including all the latest TWRP recovery features.


    Tecno H6 TWRP Recovery

    Features of the TWRP Recovery 3.0.2 for Huawei Mate 8

      * Support for NVram backup.

      * MTP Support.

      * Boot.img backup.

      * Recovery.img backup.

      * Uboot backup.

      * Emmc repair.

      * Recovery.img and boot.img install/flash.

      * USB OTG Support.

      * More features working.

    *Disclaimer:

    This update is provided As Is.

    ArykTECH, TeamWIN Recovery or any other parties relating to the development of this Recovery.img are not responsible for your actions, thus; if your device is damaged, got bricked or any other loss you may suffer as a result of this upgrade. Upgrade at your own discretion and endeavor to follow the instructions for flashing this recovery on your Huawei Mate 8 carefully.

    How to Flash this Recovery.img On your Huawei Mate 8


    First, decompress the downloaded recovery (if it is compressed in a zip folder) to obtain the img file of the TWRP Recovery in the folder and then, use any of the methods listed below to Flash the Recovery on your Mate 8.


    1. For SP Flash Tool method, see here: How to Flash Recovery.img On MTK Android Using SP Flash.


    2. For Mobile Uncle Method, see here: How to Flash Recovery.img On MTK Android Using Mobile Uncle.


    3. For RashR Method, see here: How to Flash Recovery.img On Android Devices Using Rashr.


    Download Section:

    Download TWRP Recovery for Huawei Mate 8 here


    Tryout Android N Developer Preview On your Xperia Devices

    Try out Android N Developer Preview your Sony Xperia Z3

    Just few months ago, the Developer Preview of Android N, the next android OS version to succeed the Android Marshmallow began to rollout but only on the Google Nexus devices.


    This time, there is a good news for the Xperia users as Sony is now working with Google to further extend the developer preview of the Android N to Xperia devices.


    Xperia Android N Developer Preview

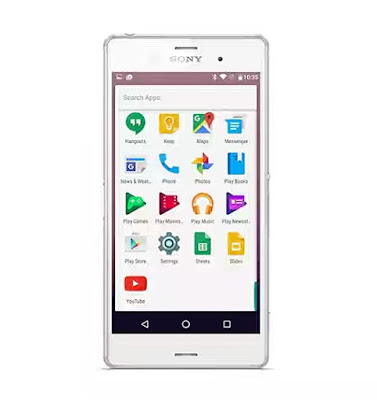
    So far, Android N is available for two variants of Xperia Z3 – the D6603 and D6653 and Sony was kind enough to provide a screenshot of the device running the next incarnation of Android.


    Here’s a Recap of What is Expected In Android N:

    Multi-window support – This new multi-tasking feature lets users open up two apps on the screen at once.


    Bundled notifications – You can group messages together, for example, by message topic. Users can then take actions in one place.


    Direct reply notifications – Users can respond quickly to notifications directly within the notification interface.


    Efficiency – Google has improved Doze to save even more power in Android N.


    There are also new behaviors in Project Svelte, aiming to reduce the memory needs of Android.


    If you want to put your hands on it (and we know that you do), you need to use the PC Companion software. It will work only on Windows, so make sure you have a PC or a virtual machine with it installed.

    Here is a step by step guide on how to Install Android N Developer Preview on your Xperia devices


    Note:

    Since Android N Developer Preview is still in developer mode (as can be deduced from the name, of course), you should know that this firmware is not intended for daily use, so be prepared for some bugs and flaws that can make your experience much worse than with an official software. As such, we advise that you make adequate backups beforehand.


    Download and Install CM13 Android 6.0 On Lenovo Vibe Z2 Pro

    For those that always long for having custom ROM flashed on their android devices, especially, CyanogenMOD die hard fans, here is an Unofficial CM13.0 for International variant of Lenovo Vibe Z2 Pro. -thanks to Frantisheq of XDA [ ROM XDA Page Link] whitout whom this work might not be possible.


    Although Unofficial, this CM13 is fast and stable with almost everything working fine except for the radio, NFC and the sensor.

    See the list below for the features you stand to enjoy with this CM13 flashed on your Lenovo Vibe Z2 Pro.


    Lenovo Vibe Z2 Pro

    Features of the CM13 Expected to Work On Lenovo Vibe Z2 Pro:

    • It is based on Android 6.0 source.
    • Supports Multi-task and Multi-Windows features.
    • 4-in-1 Reboot Menu Options (if enabled from Developer Option)
    • CM13 Gallery and Camera
    • Other CM13 Features Working Fine

    DISCLAIMER:

    While this ROM has been tested working fine on few Lenovo Vibe Z2 Pro, there is no guarantee that it will work with yours. This ROM was not developed by ArykTECH. Please, install it at your own discretion.

    Although, I may provide some assistance if you have issue(s) with the ROM; NO guarantee of any kind is given to you.

    How to Flash this ROM On your Lenovo Vibe Z2 Pro

    Prior to Installation, please note:


      * Make a complete Backup of your ROM before installing this on your Lenovo Vibe Z2 Pro so that you may be able to restore your original ROM if you have any reason(s) to do so.


      * Flashing this ROM may have adverse effect(s) on your Lenovo Vibe Z2 Pro if proper care is not taken.


      * This ROM is specifically meant for Lenovo Vibe Z2 Pro. Flashing this ROM on any other android device may spell disaster for that device.

    Steps for Flashing this ROM On Lenovo Vibe Z2 Pro

    1. Download this ROM for your Vibe Z2 Pro from here.


    2. Copy or move the downloaded ROM to root folder of your Vibe Z2 Pro.


    3. Reboot the phone to recovery. NOTE: It has to be custom recovery. Download TWRP 3.0.2 from here (Recommended).


    4. Factory Reset the phone from recovery, wipe cache, and delvic.


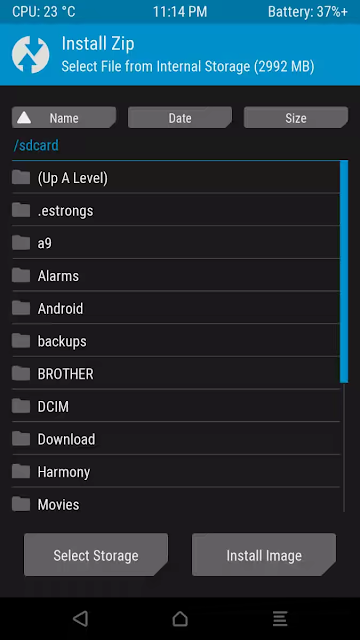
    5. Flash the ROM by selecting Install (from SD Card), navigate to the ROM file on your storage and select it.


    6. Wait few minutes until the flashing operation is complete and then.


    7. Finally, reboot the phone and enjoy!


    How to Flash Android N Developer Preview On Sony Xperia Devices

    Since Android N Developer Preview has been rolling out for selected android devices, some android users who are not using Gogle Nexus devices might be willing to have the Android N developer Preview flashed on their various Android devices as well.


    Xperia Android N Developer Preview

    Well, for Sony Xperia android device users, here is an answer to put stop to your wait and quench your curiosity.


    Following the step by step guides here, you can flash Android N Developer preview on selected Sony Xperia android devices, most commonly, the Xperia Z3.


    Flashing Android N Developer Preview On your Compatible Xperia Devices

    To know that your Sony Xperia device is eligible for the operation or, you simply want to flash Android N Developer Preview on the device, here’s how to get started:


    1. Connect your compatible Xperia device to a computer using a USB cable.

      NOTE:

      1. Sony Companion has to be installed on the PC.


      2. Other necessary android USB drivers has to be installed as well.


      3. Make sure you have Xperia Companion version 1.1.24 or later installed on the PC. Download latest Xperia Companion here.

    2. Xperia Companion will open automatically once it detects the connected Xperia device.


    3. Hold down the ALT key on your computer and click on Software Repair on the home screen, then follow the guide.

    4. Now, you’ll be asked to disconnect and turn off your device, then to reconnect whilst holding down the volume down key to start the software flashing.


    If you want, and for any reason, you can return to factory settings at any time by connecting back to Xperia Companion and following the Software Repair instructions again.


    If this piece of info was useful to you, please share to help others.

    Also, follow us on Facebook here, Twitter here and Google+ here.


    Download KangVIP, the Most Stable Custom ROM for Huawei Mate 8 [Pre-Rooted]

    Huawei Mate 8 users now have the most stable custom ROM yet! The latest KangVIP custom ROM for Huawei Mate 8 just surfaced -thanks to ajsmsg78 [KangVIP ROM XDA Page] who built the ROM from source.


    This build of KangVIP ROM include a list of advanced features as well as the removal of few bloatware which normally slowers the phone down.

    See the list below for the features you stand to enjoy in this build of KangVIP ROM.


    Huawei Mate 8

    KangVIP ROM for Huawei Mate 8 Features:

    • It is based off of the latest AL10 firmware
    • Uses Insecure boot.img
    • Does not force encryption
    • 4-in-1 Reboot Menu Options
    • Pre-Rooted with SuperSU
    • KangVIP Tools (K-settings)
    • AdAway
    • Total Commander File Explorer
    • Automatic Call Recording
    • Strobe on incoming call
    • DPI Changer in K-Settings Xposed
    • Viper4Android
    • Perfect colour bar
    • Extra EMUI Themes
    • Blur Wallpaper
    • Slightly Debloated
    • Merged AL10 & L29 cust
    • Multiwindow for 381 apps
    • Google Play Store
    • Google Contacts Sync
    • Google Calendar Sync
    • Google Keyboard
    • Google Chrome
    • Fast & Snappy

    DISCLAIMER:

    While this ROM has been tested working fine on few Huawei Mate 8, there is no guarantee that it will work with yours. This ROM was not developed by ArykTECH. Please, install it at your own discretion. Although, I may provide some assistance if you have issue(s) with the ROM; NO guarantee of any kind is given to you.

    How to Flash KangVIP ROM On your Huawei Mate 8

    Prior to Installation, please note:


      * Make a complete Backup of your ROM before installing this on your Hauwei Mate 8 so that you may be able to restore your original ROM if you have any reason(s) to do so.


      * Flashing this ROM may have adverse effect(s) on your Hauwei Mate 8 if proper care is not taken.


      * This ROM is specifically meant for Hauwei Mate 8. Flashing this ROM on any other android device may spell disaster for that device.

    Flashing KangVIP ROM On Huawei Mate 8

    1. Download this ROM for your Huawei Mate 8 from here.


    2. Copy or move the downloaded ROM to root folder of your Haiwei Mate 8.


    3. Reboot the phone to recovery. NOTE: It has to be custom recovery. Download TWRP 3.0.2 from here (Recommended).


    4. Factory Reset the phone from recovery, wipe cache, and delvic.


    5. Flash the ROM by selecting Install (from SD Card), navigate to the ROM file on your storage and select it.


    6. Wait few minutes until the flashing operation is complete and then.


    7. Finally, reboot the phone and enjoy!


    Hauwei Ascend P7 Android 5.1 Lollipop Firmware Update [April 2016 Update]

    Huawei Ascend P7 (P7-L10) Europe variant gets an Official Android 5.1 Lollipop firmware update with firmware version B840 and is now available for download as a full Update.app package.

    Although this update arrived late, it is better that it arrived than never. So, if you have Huawei Ascend P7 and willing to upgrade to the latest official android 5.1 Lollipop, read further.


    In the lines that follow, we discuss step by step guides on how to upgrade your Hauwei Ascend to the latest official android 5.1 lollipop.


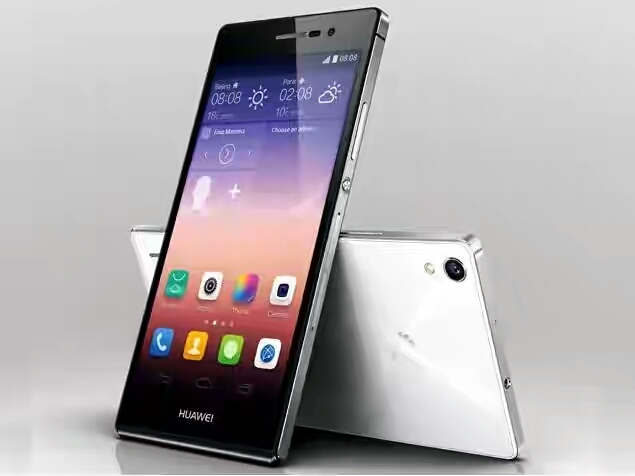
    Huawei Ascend P7

    Neertheless, if you are having Europe variant of the Huawei Ascend P7, a notification to update your device should have popped up already, if otherwise, you may simply follow the step by step guide given here to manually update your Huawei P7 (P7-L10) to the latest official android 5.1 Lollipop firmware.


    Update Details for Huawei P7-L10 Firmware

  • Device: Huawei Ascend P7
  • Model: P7-L10
  • Carrier: Vodafone
  • Android Version: 5.1 Lollipop
  • EMUI: 3.1
  • Firmware: B840
  • Build Number: P7-L10C02B840
  • Status: Official (stable)
  • Type: Full firmware upgrade image
  • Release Date: 07.04.2016
  • Region: Europe
  • Country: Spain
  • File Name: P7-L10_C02B840_Firmware_Spain_VDF_Andriod 5.1_EMUI 3.1.zip

  • Before YOU Install this Firmware

    1. Make sure that your device is a Europe variant of Huawei Ascend P7.


    2. Backup all the necessary files on your Huawei Ascend P7 as this process may cost you some or all of your contents.


    3. Make sure that your device is at least, 30 - 50% charged.


    *Disclaimer: This update is provided as is. ArykTECH or the developers are not responsible, if your device is damaged, got bricked or any other loss you may suffer as a result of this upgrade. Upgrade at your own discretion and endeavor to follow the instructions carefully.

    How to Update Huawei Ascend P7 (P7-L10) to this Official Android 5.1 Lollipop firmware version B840:

    1. Download Huawei Ascend P7 Official Android 5.1 Lollipop firmware B840 upgrade from here: Huawei P8 Firmware Update Download Link.


    2. Extract the downloaded file to a folder on your PC and copy the dload folder to the root folder of the external microSD card on your Huawei Ascend P7.


    3. Now, reboot your Huawei Ascend P7 while holding the Volume Up + Volume Down + Power keys together until the phone boots to download mode.


    4. Once in the Download Mode, the upgrade should start immediately.


    5. Wait patiently for the device to complete the update and then, restart it.


    That’s it! Your Huawei Ascend P7 should now have Official Android 5.1 Lollipop firmware with version B840 running!


    To verify, Go to Settings > About phone to view your current firmware and Android versions.


    If this piece of info was useful to you, please share to help others.

    Also, follow us on Facebook here, Twitter here and Google+ here.


    Resurrection Remix v2 Custom ROM for Walton Primo RM

    Walton Primo just got another very stable custom ROM which is Resurrection Remix. Resurrection Remix custom ROM are common with other android devices as well but, this Resurrection Remix v2 ROM for Walton Primo brings a lot more features to the device than you can ever imagine.


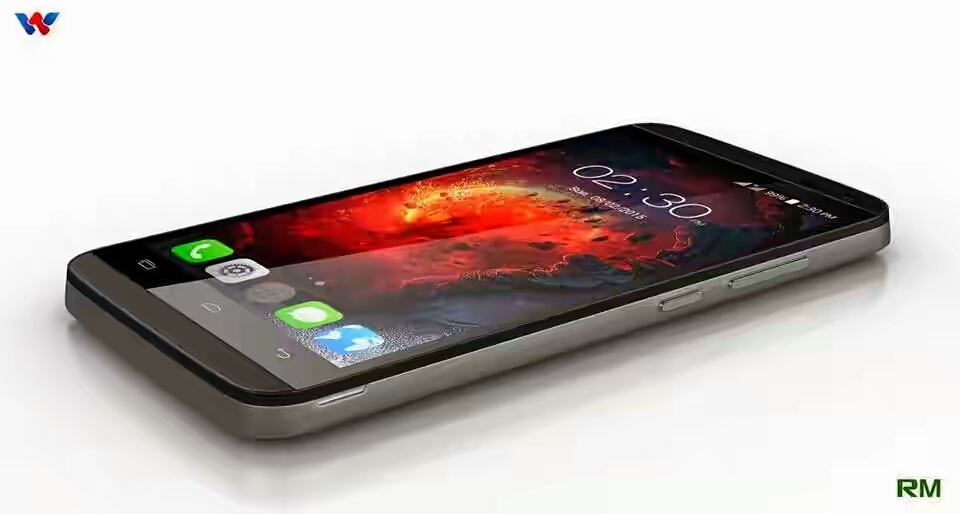
    Walton Primo RM

    DISCLAIMER: While this ROM has been tested working fine on few Walton Primo, there is no guarantee that it will work with yours. This ROM was not developed by ArykTECH. Please, install it at your own discretion. Although, I may provide some assistance if you have issue(s) with the ROM; NO guarantee of any kind is given to you.

    Installing this ROM On your Walton Primo

    Prior to Installation, please note:


      * Make a complete Backup of your ROM before installing this on your Walton Primo so that you may be able to restore your original ROM if you have any reason(s) to do so.


      * Flashing this ROM may have adverse effect(s) on your Walton Primo if proper care is not taken.


      * This ROM is specifically meant for Walton Primo. Flashing it on any other android device may spell disaster for that device.

    RR ROM Features that Work In this ROM On Walton Primo

    Although, not much reviews of this ROM has been gathered yet, it is certain that all the important features of the usual Resurrection Remix are working fine in the ROM. You may check the list below;


    • Navigation Bar Features
    • 1. Enable/Disable Navbar

      2. Navbar Ring Switch

      3. Navbar Ring Targets

      4. Navbar Button Customization

      5. Navbar Dimensions(Portrait & Landscape)


    • Status-bar Features
    • 1. Brightness Slider

      2. Enable/Disable Show Notification Count

      3. Superuser Indicator Switch

      4. Carrier Label

      5. Carrier Label Switch

      6. Carrier label Color

      7 .Quick PullDown Switch

      8. Smart Pulldown Switch

      9. Clock Customizations

      10. Time & date

      11. Clock Color

      12. Day & date Toogle

      13. Center Clock/Right Clock Choice Battery

      14. Battery Bar customization

      15. Battery Icon

      16. Customization(circle/landscape/Potrait and more)

      17. Battery % Text

      18. Network Traffic Indicator-Theme Chooser

      19. RR exclusive PITCH BLACK THEME Animations

      20. Toast Animations

      21. ListView Animations

      22.System Animations-Gestures

      23. Gestures Anywhere Feature-App Circle Bar

      24.Choose apps in App circle


    • Clock Widget Features
    • 1. Clock And Alarm Customizations

      2. Weather Panel Customizations

      3. Calendar Events


    • LockScreen Features
    • 1. Lockscreen Shortcuts

      2. Choose upto 5 Shortcuts

      3. 100+ Icons for Shortcuts

      4. Quick Slider Shortcuts


    • Notification Drawer
    • 1. Weather Display Switch

      2. Quick Settings

      3. Choice to Add 20+ Tiles

      4. Enable 2/3/4 Tiles per Row

      5. Enable Disable Brightness Slider in 6.Notification Panel

      7. Advanced Location Settings

      8. Switch(Choose Battery saving/Device Only/High

      9. Accuracy Directly in Notification Panel)

      10. LongPress Toggles to Enter Settings


    • Buttons
    • 1. Backlight Timer

      2. Backlight Strength

      3. Navigation Bar left/Right handed mode Switch

      4. Power Menu

      5.Power Menu End Calls Switch


    • Home button
    • 1. Home Button Wake Up

      2. Home Button answer call

      3. Long Press Actions

      4. Double Tap Actions


      And much more.

      Bugs:

      1. Phone storage not show in PC

      2. MX player bug (Use darker apk to solve)

      3. Incall vibration (It's a source bug in RM)

    Creadit(s):- XDA Developers; Ajit Guraya


    RR ROM for Primo RM

    Install this Resurrection Remix ROM On Walton Primo

    1. Download this ROM for your Walton Primo from here.


    2. Copy or move the downloaded ROM to your SD Card.


    3. Reboot the phone to recovery. NOTE: It has to be custom recovery.


    4. Factory Reset the phone from recovery, wipe cache, and delvic.


    5. Flash the ROM by selecting Install from SD Card, navigate to the ROM file on your storage and select it.


    6. Wait few minutes until the flashing operation is complete and then, go back to the recovery main menu.


    7. Finally, reboot your Walton Primo and enjoy!


    Other Similar Tutorials

    1. How to Root Lenovo A6000

    2. Root Without PC: Download All Kingroot Versions Here

    3. How to Flash Custom Recovery On MTK Android Using Mobile Uncle

    4. How to Flash Samsung Android Devices

    5. How to Flash iTel Android Devices Using SPD Flash Tool


    If this piece of info was useful to you, please share to help others.

    Also, follow us on Facebook here, Twitter here and Google+ here.


    CM13.1 Custom ROM for Lenovo A6000 (Android 6.0.1)

    It is good news that Lenovo A6000 users who are able to root and flash custom recovery on their device can now flash CM13.1 on their devices since CM13.1 Android 6.0.1 Marshmallow custom ROM is now available for the device.


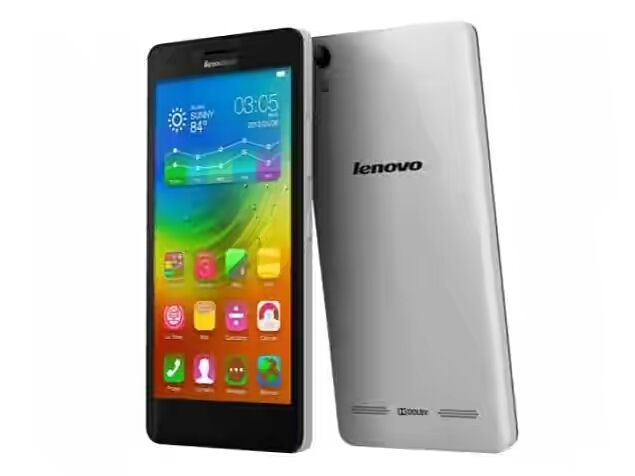
    Lenovo A6000

    DISCLAIMER: While this ROM has been tested working fine on few Lenovo A6000, there is no guarantee that it will work with yours. This ROM was not developed by ArykTECH. Please, install it at your own discretion. Although, I may provide some assistance if you have issue(s) with the ROM; NO guarantee of any kind is given to you.

    Installing this ROM On your Lenovo A6000

    Prior to Installation, please note:


      * Make a complete Backup of your ROM before installing this on your Lenovo A6000 so that you may be able to restore your original ROM if you have any reason(s) to do so.


      * Flashing this ROM may have adverse effect(s) on your Lenovo A6000 if proper care is not taken.


      * This ROM is specifically meant for Lenovo A6000. Flashing it on any other android device may spell disaster for that device.

    CM13 Features that Work In this ROM On Lenovo A6000

    Although, not much reviews of this ROM has been gathered yet, it is certain that all the important features of the CM13.1 are working fine in the ROM. You may check the list below for the list;


      * Battery Saving (Doze) Feature.

      * Multitasking and Multi-Windows.

      * CM Android M Luncher.

      * OTA Update.

      * And other CM features.

    Creadit(s):- CM13.1


    CM13

    Install this CM13.1 ROM On Lenovo A6000

    1. Download this ROM for your Lenovo A6000 from here.


    2. Download CM13.1 Gapps for Lenovo A6000 from here


    3. Copy or move the downloaded ROM and the Gapps to your SD Card.


    4. Reboot the phone to recovery. NOTE: It has to be custom recovery.


    5. Factory Reset the phone from recovery, wipe cache, and delvic.


    6. Flash the ROM by selecting Install from SD Card, navigate to the ROM file on your storage and select it.


    7. Wait few minutes until the flashing operation is complete and then, flash the Gapps following the same procedures as for the ROM.


    8. Finally, reboot the phone and enjoy!


    Other Similar Tutorials

    1. How to Root Lenovo A6000

    2. Root Without PC: Download All Kingroot Versions Here

    3. How to Flash Custom Recovery On MTK Android Using Mobile Uncle

    4. How to Flash Samsung Android Devices

    5. How to Flash iTel Android Devices Using SPD Flash Tool


    If this piece of info was useful to you, please share to help others.

    Also, follow us on Facebook here, Twitter here and Google+ here.


    Xperia Full HD ROM for Tecno Phantom A F7 [Android 4.4.4]

    Here is an android 4.4.4 kitkat custom ROM for Tecno Phantom A+ f7. Because this ROM is ported from Sony Xperia, it is loaded many Stock Xperia features that will give your Tecno Phantom A+ f7 a complete new looK.


    Tecno Phantom A+ f7

    DISCLAIMER: While this ROM has been tested working fine on few Tecno Phantom A+ f7, there is no guarantee that it will work with yours. This ROM was not developed by ArykTECH. Please, install it at your own discretion. Although, I may provide some assistance if you have issue(s) with the ROM; NO guarantee of any kind is given to you.

    Installing this ROM On your Tecno Phantom A+ F7

    Prior to Installation, please note:


      * Make a complete Backup of your ROM before installing this on your Tecno Phantom A+ F7 so that you may be able to restore your original ROM if you have any reason(s) to do so.


      * Flashing this ROM may have adverse effect(s) on your Phantom A+ F7 if proper care is not taken.


      * This ROM is specifically meant for Tecno Phantom A+ f7. Flashing it on any other android device may spell disaster for that device.

    Features of Sony Xperia that Work On this ROM for Phantom A+ F7

    Before flashing this ROM, it would be a good idea for you to scan through the features of the ROM which are listed below;


      *Xperia Z2 HOME & Simple Home

      *Xperia Z2 Themes

      *13MP Rear and 2MP Front Camera

      *Xperia Z2 SystemUI

      *Xperia Z2 Framework

      *Xperia Z2 Media Apps

      *Xperia Z2 System Apps

      *Xperia Z2 Widgets

      *Latest Xperia Keyboard

      *Xperia Z2 Fonts

      *Xperia Z2 Smart Social Camera

      *Xperia Z2 Style Settings

      *Xperia C Style Camera

      *Xperia Z2 Wallpapers

      *Xperia Z2 Sounds

      *Xperia Z2 Bootanimation

      *Full Aquaris 5 HD Camera Framework

      *Xperia Z2 build.prop

      *No network/Wifi issues

      *3G SIM Switching

      *DOLBY Digital Plus

      *RAM Saving

      *Battery Savings

      *Advanced Reboot Menu

      *Sony Sound Enhancement ClearAudio+

      *No Bloatwares

    Creadit(s):- XDA Community


    How To Install this ROM on Phantom A+ f7

    1. Download this ROM for your Phantom A+ f7 from here.


    2. Copy or move the downloaded ROM to your SD Card.


    3. Reboot the phone to recovery. NOTE: It has to be custom recovery.


    4. Factory Reset the phone from recovery, wipe cache, and delvic.


    5. Flash the ROM by selecting Install from SD Card, navigate to the ROM file on your storage and select it.


    6. Wait few minutes until the flashing operation is complete and then, reboot the phone.


    Also Note:

    Sound will not work on this ROM until you flash the Sound patch for Tecno Phantom A+ F7 from the recovery.

    To do this;

      1. After flashing the ROM on the phone, reboot it.

      2. Download the Sound Patch from here and move it to the SD Card.

      3. Reboot the phone to recovery and flash the Sound patch file. No need to wipe or factory reset anything.

    Enjoy!


    If this piece of info was useful to you, please share to help others.

    Also, follow us on Facebook here, Twitter here and Google+ here.


    How to Hard Reset Asus FonePad 8

    If you need to Factory Reset or Hard Reset your Asus FonePad 8, depending on the situation at hand; here is how to Hard Reset or Factory Reset your FonePad 8.


    Hard Reset is the process of reverting your phone's settings to its factory defaults using some key combinations needless to go through the phone settings before doing so. While Factory Reset is the process of resetting your phone to its factory default settings while the phone is on Android Mode.


    The end result of both method is to clear or wipe off your phone, in this case, your Asus FonePad 8.


    Helpful LinksRelated Links

    Asus PadFone Infinity Lite

    CAUTION: Before YOU Proceed!

    Either of these processes will cost you all the contents on your phone including your installed apps, SMS, MMS, Pictures, Videos and Movies (stored on the phone's memory).

    Therefore; endeavor to backup the necessary files before you proceed.


    How to Hard Reset your Asus FonePad 8

    1. Turn off your FonePad 8.


    2. Now, press and hold Volume Down + Power buttons until you see some texts appear on the phone's screen then, release the buttons.


      The text option on screen should read as thus;

    • 1. Enter Recovery Mode
    • 2. Exit Update Screen

    3. Using the Volume Buttons, navigate to Enter Recovery Mode and select it using the Power Button.


    4. You should now be in the android recovery screen. Using the Volume Buttons, navigate to Wipe Data/Factory Reset and select it using the Power button.


    5. The next screen should show you several NOs with a YES....

    Navigate to "Yes..." from the options, and select it using the Power button.


    5. Wait while FonePad 8 resets.

    Now select the option "reboot system now" using Power button.


    You have now successfully reset your Asus FonePad 8 to its factory default settings from the recovery.


    How to Factory Reset your Asus FonePad 8

    1. If the display is off, using the power button, turn the phone on.


    2. Navigate to Menu and then, Settings.


    3. From there, locate Backup & Reset and then; select Factory Data Reset.


    4. From the screen, choose Reset Phone.

    Confirm the action by tapping Erase everything.

      NOTE: if you're on Android 5.X.X, you'll be shown a pass code to enter in a box next to the code. Enter it and proceed.


    Wait while the phone is reset and by that, you have successfully factory reset your Asus FonePad 8..


    If this piece of info was useful to you, please share to help others.

    Also, follow us on Facebook here, Twitter here and Google+ here.


    Xperia ROM Port for Tecno M5 (XperiaUI Custom ROM)

    If you want a taste of Sony Xperia functionalities on your Tecno M5, here is a Custom ROM ported from Sony Xperia device for your Tecno M5.


    Because this ROM is ported from Sony Xperia devices, it combines the features of Xperia Z1, Z2 and Z3 together for the Tecno M5.


    Tecno M5

    DISCLAIMER: While this ROM has been tested working fine on few Tecno M5, there is no guarantee that it will work with yours. This ROM was not developed by ArykTECH. Please, install it at your own discretion. Although, I may provide some assistance if you have issue(s) with the ROM; NO guarantee of any kind is given to you.

    Installing this ROM On your Tecno M5

    Prior to Installation, please note:


      * Make a complete Backup of your ROM before installing this on your Tecno M5 so that you may be able to restore your original ROM if you have any reason(s) to do so.


      * Flashing this ROM may have adverse effect(s) on your M5 if proper care is not taken.


      * This ROM is specifically meant for Tecno M5. Flashing it on any other android device may spell disaster for that device.


    Features of Sony Xperia that Work On this ROM for Tecno M5

    Before flashing this ROM, it would be a good idea for you to scan through the features of the ROM which are listed below;


      * Xperia Z2 HOME

      * Xperia Z2/Z1 Themes

      * 13MP Rear and 8MP Front Camera

      * Xperia Z2 SystemUI

      * Xperia Z2 Framework

      * Xperia Z2 Media Apps (Album, Movies, Walkman, Movie Creator, Vid&Music Unlmtd)

      * Xperia Z2 Apps (Clock, Calculator, Notes, Sketch, Socialife, Select, Email, Calendar, Downloads, Sound Recorder)

      * Xperia Z2 Widgets (Camera, Clock, Walkman, Photo, Weather, World Clock, Top Contacts, recent, tools)

      * Xperia Keyboard

      * Xperia Z2 Fonts

      * Xperia Z2 Smart Social Camera

      * Xperia Z2 Style Settings

      * Xperia C Style Camera

      * Xperia Z2 Wallpapers

      * Xperia Z2 Sounds

      * Xperia Z2 Bootanimation

      * True DOLBY Surround Sound 3D integration

      * Xperia Z2 build.prop

      * No network/Wifi issues

      * 3G SIM Switching

      * S-Force Surround Sound 3D

      * RAM Saving

      * Battery Savings

      * Advanced Reboot Menu

      * No Xposed PreInsalled

      * Z1. Smart Gestures

    Creadit(s):- XDA Community


    How To Install this ROM on M5

    1. Download this ROM for your M5 from here.


    2. Copy or move the downloaded ROM to your SD Card.


    3. Reboot the phone to recovery. NOTE: It has to be custom recovery.


    4. Factory Reset the phone from recovery, wipe cache, and delvic.


    5. Flash the ROM by selecting Install from SD Card, navigate to the ROM file on your storage and select it.


    6. Wait few minutes until the flashing operation is complete and then, reboot the phone.


    If this piece of info was useful to you, please share to help others.

    Also, follow us on Facebook here, Twitter here and Google+ here.


    How to Hard Reset Asus PadFone Infinity Lite

    If you need to Factory Reset or Hard Reset your Asus PadFone Infinity Lite, depending on the situation at hand; here is how to Hard Reset or Factory Reset your PadFone Infinity Lite.


    Hard Reset is the process of reverting your phone's settings to its factory defaults using some key combinations needless to go through the phone settings before doing so. While Factory Reset is the process of resetting your phone to its factory default settings while the phone is on Android Mode.


    The end result of both method is to clear or wipe off your phone, in this case, your Asus PadFone Infinity Lite.


    Helpful LinksRelated Links

    Asus PadFone Infinity Lite

    CAUTION: Before YOU Proceed!

    Either of these processes will cost you all the contents on your phone including your installed apps, SMS, MMS, Pictures, Videos and Movies (stored on the phone's memory).

    Therefore; endeavor to backup the necessary files before you proceed.


    How to Hard Reset your Asus PadFone Infinity Lite

    1. Turn off your Padfone Infinity Lite.


    2. Now, press and hold Volume Down + Power buttons until you see some texts appear on the phone's screen then, release the buttons.


      The text option on screen should read as thus;

    • 1. Enter Recovery Mode
    • 2. Exit Update Screen

    3. Using the Volume Buttons, navigate to Enter Recovery Mode and select it using the Power Button.


    4. You should now be in the android recovery screen. Using the Volume Buttons, navigate to Wipe Data/Factory Reset and select it using the Power button.


    5. The next screen should show you several NOs with a YES....

    Navigate to "Yes..." from the options, and select it using the Power button.


    5. Wait while the phone resets.

    Now select the option "reboot system now" using Power button.


    You have now successfully reset your Asus PadFone Infinity Lite to its factory default settings from the recovery.


    How to Factory Reset your Asus Padfone Infinity Lite

    1. If the display is off, using the power button, turn the phone on.


    2. Navigate to Menu and then, Settings.


    3. From there, locate Backup & Reset and then; select Factory Data Reset.


    4. From the screen, choose Reset Phone.

    Confirm the action by tapping Erase everything.

      NOTE: if you're on Android 5.X.X, you'll be shown a pass code to enter in a box next to the code. Enter it and proceed.


    Wait while the phone is reset and by that, you have successfully factory reset your Asus PadFone Infinity Lite..


    If this piece of info was useful to you, please share to help others.

    Also, follow us on Facebook here, Twitter here and Google+ here.


    Xperia ROM Port for Tecno R7 (Android 4.4.X)

    Here is an android 4.4.2 kitkat custom ROM for Tecno R7. This ROM is a Sony Xperia ported ROM for Tecno R7 and it is loaded with enough Sony Xperia stock features that will give your Tecno R7 a complete new looK.


    Tecno R7

    DISCLAIMER: While this ROM has been tested working fine on few Tecno R7, there is no guarantee that it will work with yours. This ROM was not developed by ArykTECH. Please, install it at your own discretion. Although, I may provide some assistance if you have issue(s) with the ROM; NO guarantee of any kind is given to you.

    Installing this ROM On your Tecno R7

    Prior to Installation, please note:


      * Make a complete Backup of your ROM before installing this on your Tecno R7 so that you may be able to restore your original ROM if you have any reason(s) to do so.


      * Flashing this ROM may have adverse effect(s) on your R7 if proper care is not taken.


      * This ROM is specifically meant for Tecno R7. Flashing it on any other android device may spell disaster for that device.


    Features of Sony Xperia that Work On this ROM for Tecno R7

    Before flashing this ROM, it would be a good idea for you to scan through the features of the ROM which are listed below;


      * Xperia HOME & Simple Home

      * Xperia Themes

      * Xperia Media Apps

      * Xperia System Apps

      * Xperia Widgets

      * Latest Xperia Keyboard

      * Xperia Fonts

      * Xperia Smart Social Camera

      * Xperia Style Settings

      * Xperia Style Camera

      * XperiaWallpapers

      * Xperia Sounds

      * Xperia Bootanimation

      * Xperia build.prop

      * No network/Wifi issues

      * 3G SIM Switching

      * DOLBY Digital Plus

      * RAM Saving

      * Battery Savings

    Creadit(s):- XDA Community


    How To Install this ROM on R7

    1. Download this ROM for your R7 from here.


    2. Copy or move the downloaded ROM to your SD Card.


    3. Reboot the phone to recovery. NOTE: It has to be custom recovery.


    4. Factory Reset the phone from recovery, wipe cache, and delvic.


    5. Flash the ROM by selecting Install from SD Card, navigate to the ROM file on your storage and select it.


    6. Wait few minutes until the flashing operation is complete and then, reboot the phone.


    If this piece of info was useful to you, please share to help others.

    Also, follow us on Facebook here, Twitter here and Google+ here.


    Nexus 5 Custom ROM for Phantom A F7 (Android 4.4.2)

    Here is an android 4.4.2 kitkat custom ROM for Tecno Phantom A+ f7. Because this ROM is ported from Nexus 5, it is loaded with enough features that will give your Tecno Phantom A+ f7 a complete new looK.


    Tecno Phantom A+ f7

    DISCLAIMER: While this ROM has been tested working fine on few Tecno Phantom A+ f7, there is no guarantee that it will work with yours. This ROM was not developed by ArykTECH. Please, install it at your own discretion. Although, I may provide some assistance if you have issue(s) with the ROM; NO guarantee of any kind is given to you.

    Installing this ROM On your Tecno Phantom A+ F7

    Prior to Installation, please note:


      * Make a complete Backup of your ROM before installing this on your Tecno Phantom A+ F7 so that you may be able to restore your original ROM if you have any reason(s) to do so.


      * Flashing this ROM may have adverse effect(s) on your Phantom A+ F7 if proper care is not taken.


      * This ROM is specifically meant for Tecno Phantom A+ f7. Flashing it on any other android device may spell disaster for that device.

    Features of Nexus 5 that Work On this ROM for Phantom A+ F7

    Before flashing this ROM, it would be a good idea for you to scan through the features of the ROM which are listed below;


      * Floating Call Window

      * Android 4.4.2 KitKat

      * Build.Prop Tweaks

      * Transparent Notification Bar

      * KitKat Style UI

      * Stable ROM

      * Init.d Support

      * OTA Updates

      * Xposed Support

      * Preloaded Usefull Apps

    Creadit(s):- XDA Community


    How To Install this ROM on Phantom A+ f7

    1. Download this ROM for your Phantom A+ f7 from here.


    2. Copy or move the downloaded ROM to your SD Card.


    3. Reboot the phone to recovery. NOTE: It has to be custom recovery.


    4. Factory Reset the phone from recovery, wipe cache, and delvic.


    5. Flash the ROM by selecting Install from SD Card, navigate to the ROM file on your storage and select it.


    6. Wait few minutes until the flashing operation is complete and then, reboot the phone.


    Also Note:

    Sound will not work on this ROM until you flash the Sound patch for Tecno Phantom A+ F7 from the recovery.

    To do this;

      1. After flashing the ROM on the phone, reboot it.

      2. Download the Sound Patch from here and move it to the SD Card.

      3. Reboot the phone to recovery and flash the Sound patch file. No need to wipe or factory reset anything.

    Enjoy!


    If this piece of info was useful to you, please share to help others.

    Also, follow us on Facebook here, Twitter here and Google+ here.


    How to Hard Reset Huawei Honor 3C Play

    If you are here, you most likely want to Hard Reset or Factory Reset your Huawei Honor 3C Play. Here, I discuss the step by step guide on how to Hard Reset or Factory Reset your Huawei Honor 3C Play.


    Different Between Hard Reset and Factory Reset

    Hard Reset is the process of reverting your phone's settings to its factory defaults using some key combinations without going through the phone settings before doing so. While Factory Reset is the process of resetting your phone to its factory default settings by going through the phone settings.


    Helpful LinksRelated Links

    CAUTION: Before YOU Proceed!

    Either of this processes will cost you all the contents on your phone including your installed apps, SMS, MMS, Pictures, Videos and Movies (stored on phones memory).

    Therefore; endeavor to backup the necessary files before you proceed.


    How to Hard Reset your Huawei Honor 3C Play

    1. Turn off your Huawei Honor 3C Play.


    Huawei Honor Holly Power

    2. Now, press and hold Volume Up + Power button until you see Adnroid/Huawei logo appears on your phone's screen and then, release the keys.


    Huawei Honor 3C Recovery Combo

    3. Using the Volume buttons, navigate to the option "wipe data/factory reset", and confirm that action using the Power button.


    Huawei Honor Holly Recovery

    4. The next screen shows you several NOs with a YES. Navigate to "Yes" from the options, and select it using the Power button.


    5. Wait while the phone resets.

    Now select the option "reboot system now" using Power button.


    You have now successfully reset your Huawei Honor 3C Play. to its factory default settings.


    How to Factory Reset your Huawei Honor 3C Play

    1. If the display is off, using the power button, turn the phone on.


    2. Navigate to Menu and then, Settings.


    3. From there, locate Backup & Settings and then; select Factory Data Reset.


    4. From the screen, choose Reset Phone.

    Confirm the action by tapping Erase everything and wait for the phone reboot.


    By that, you have successfully factory reset your Huawei Honor 3C Play..


    If this piece of info was useful to you, please share to help others.

    Also, follow us on Facebook here, Twitter here and Google+ here.